


About This Thai Tea Layer Cake
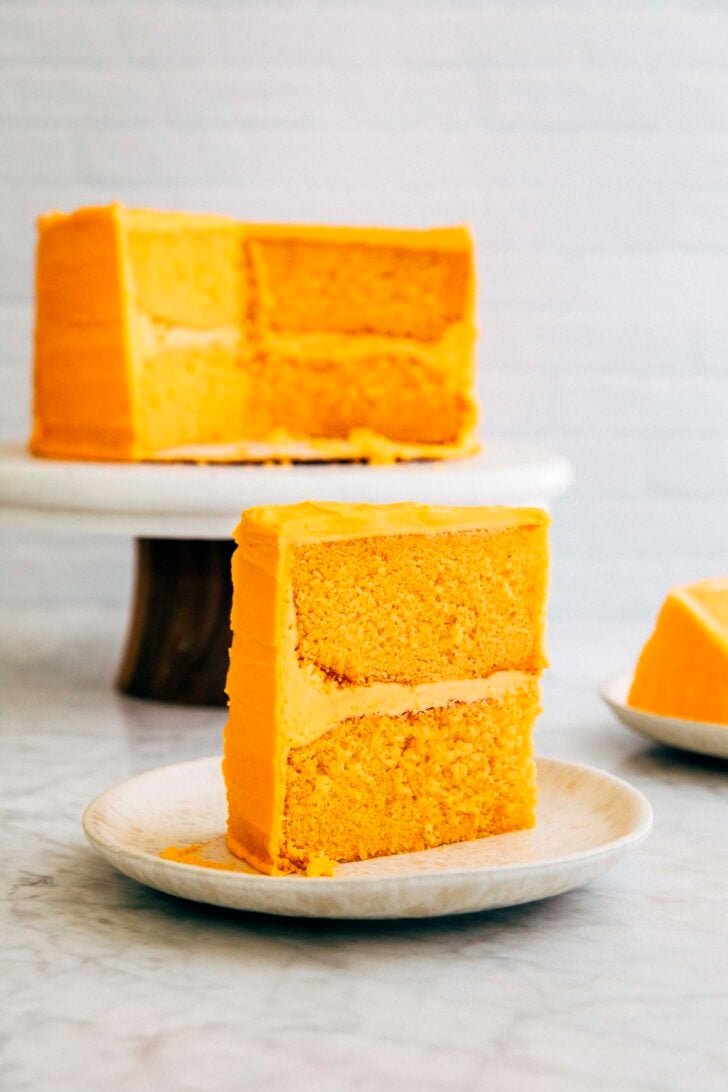
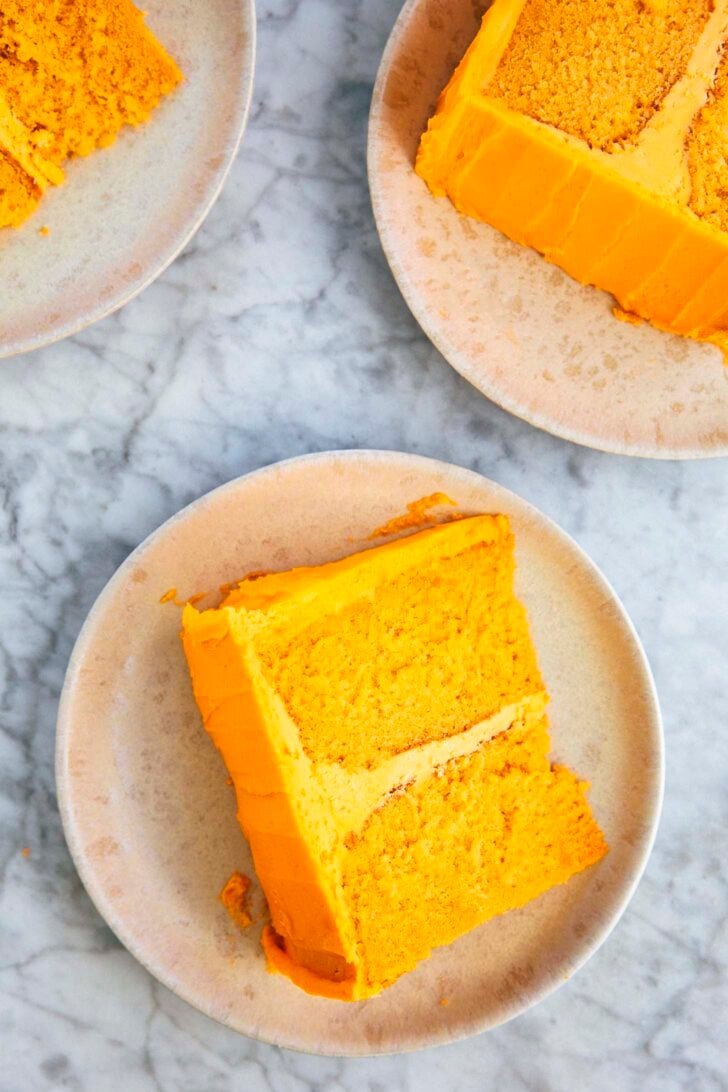
This Thai Tea layer cake is made with two layers of Thai tea infused sponge cake, topped with sweetened condensed milk frosting! It’s the Thai tea version of this incredibly popular Vietnamese Iced Coffee Cake recipe on Hummingbird High.
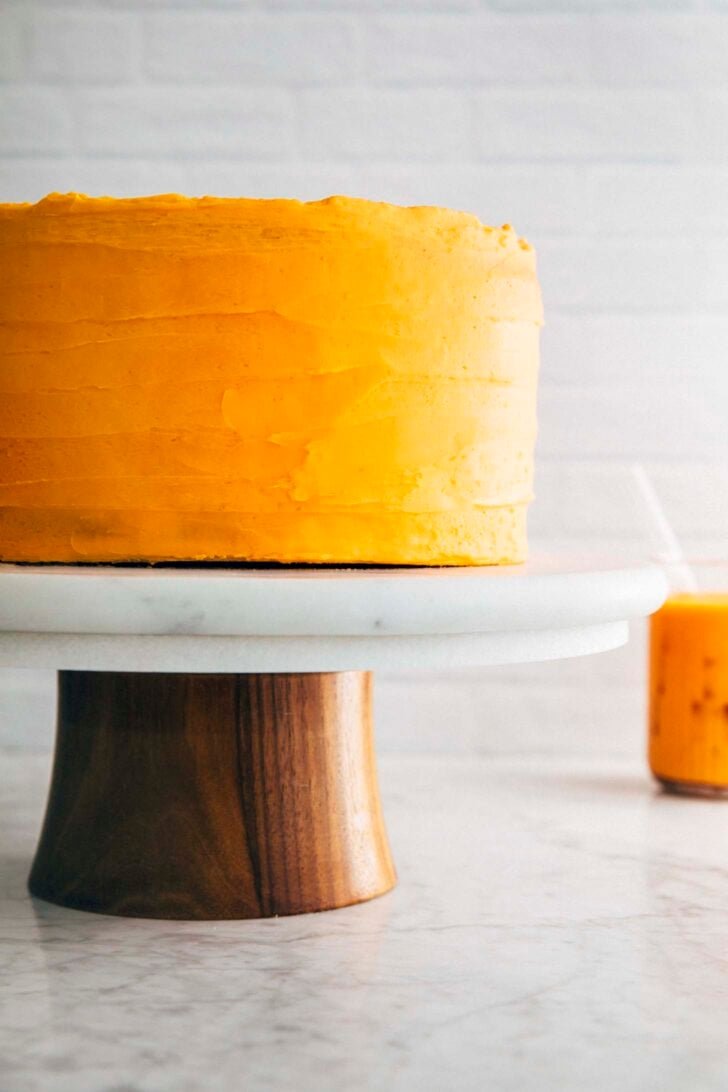
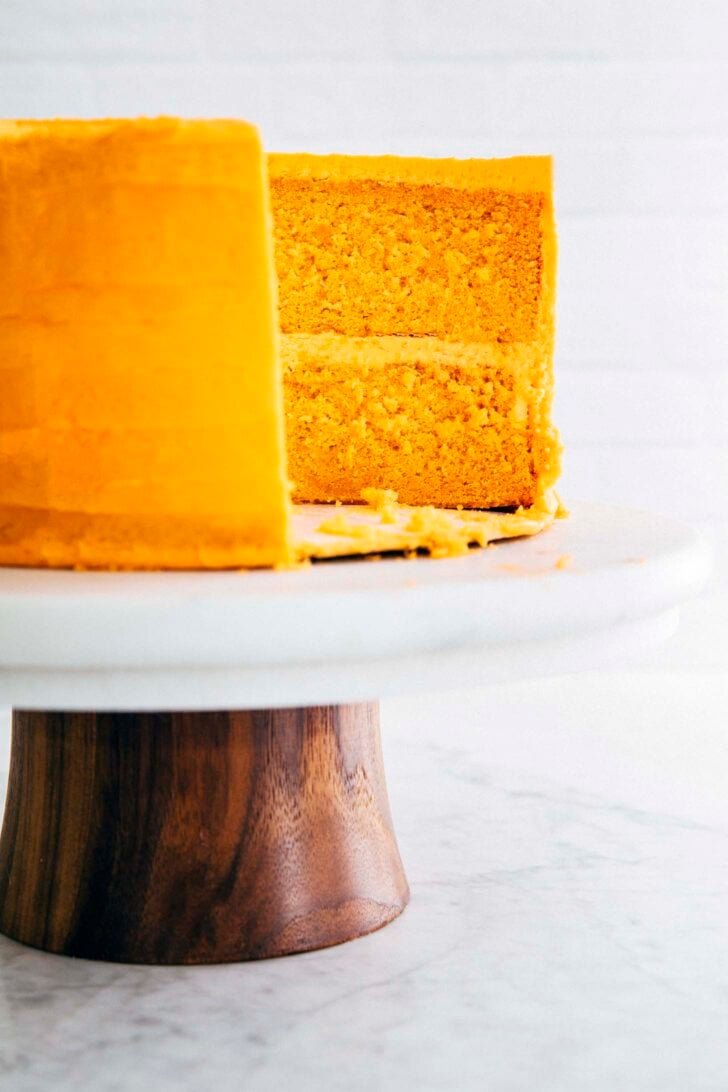
The recipe starts by instructing you to make a classic white cake (based on the recipe in my cookbook, Weeknight Baking) flavored with a homemade Thai tea concentrate. The resulting cake is light, moist, and a vibrant orange color thanks to the Thai tea. You then cover the cake with a sweetened condensed milk frosting also flavored with Thai tea to give it flavor and color.
For more delicious layer cake recipes, check out Hummingbird High‘s layer cake recipe archive!

A Note About Hummingbird High’s Thirteenth Anniversary
I made this cake to celebrate Hummingbird High‘s thirteenth birthday! Thirteen years ago today, I opened my laptop in Denver, CO to write my first ever Hummingbird High blog post. Since then, a LOT has happened. I won’t wax poetic about the specifics, but you can read a detailed history of Hummingbird High in My Best Chocolate Birthday Cake + Ten Years Of Hummingbird High.
And wow, I can’t believe three more years have passed since writing that post!
Truthfully, my relationship to this space has changed dramatically in those three years. Hummingbird High began as a labor of love and as a way for me to escape stressful day jobs and the drama of my twenties. It was a space I built for myself, and I was grateful that so many of you wanted to join the ride. And when it finally became my full-time gig in 2017, Hummingbird High slowly began to morph. It became less about me and the recipes I wanted to make, and instead more about what y’all wanted to bake. That meant doing a lot of SEO research, keeping up with trends on social media, that sort of thing. And while that was fun and gratifying for many years—I truly loved seeing everybody make the recipes I’d made based on your wants and needs—something eventually broke.
Because around two years ago, I looked up from planning my content calendar—which was filled with recipes based on Google Search keywords, easy techniques and popular ingredients on Instagram and TikTok—and realized that I personally didn’t want to make any of it. Specifically, I wasn’t excited about developing the recipes, and saw the entire enterprise as, well, just another chore on my list. Because much as I loved quick and easy baking recipes, I missed playing around with more complicated techniques and diving into big baking projects like this Vietnamese Iced Coffee Cake (which, incidentally, is one of the first cake recipes of mine that truly went viral on social media). That’s really where I was in my zone.
I did some soul searching, and realized I was most experimental and free with my recipes when I wasn’t solely relying on Hummingbird High for income. Back then, I felt less pressure to conform to strategies that would “move the needle” in terms of bringing in more sessions, followers, and ultimately, money to pay my mortgage and living expenses. So I thought to myself: what if I went back to that? What if Hummingbird High stopped being my full-time job, so that it could go back to being what I was passionate about?
And that’s how, last year, I ended up back in school as a 36-year-old master’s student studying Human Computer Interaction and Design.
I won’t go into the specifics of what HCI is and what my new career aspirations are—you can DM or email me if you’re truly interested and want to learn more, or if you’re looking to hire a product manager or UX researcher—but I assume most of you will find it snoozy. The most important thing for you to know as an ardent Hummingbird High fan (because I’m assuming that’s what you are, if you’re reading this rather lengthy block of text) is this:
Hummingbird High isn’t going away anytime soon. But my hope is that its recipes will change. Not drastically, but enough to heal what was broken a few years ago. There will still be the quick and easy baking recipes that everybody loves, but also more small batch baking and big baking projects with unique ingredients.
Like this Thai tea cake!
Ingredients and Substitutions
This section tells you everything you need to make this Thai tea layer cake with sweetened condensed milk frosting. Specifically—key ingredients, where to find them, and any potential substitutions:
Common Sources and Substitutions For Ingredients In This Thai Tea Layer Cake Recipe
- Thai Tea. I used Pantai Norasingh Thai Iced Tea Mix to make my Thai tea concentrate. It’s what most Thai restaurants use to make Thai tea! You can order it online, or get it at your local Asian grocery store in the coffee and tea section.
- Cake Flour. My favorite cake flour is Swans Down Cake Flour. In a pinch, you can make your own! Check out my recipe for homemade cake flour.
- Kosher Salt. Kosher salt is the best salt for baking recipes. But you can replace the kosher salt in the recipe with table salt. Just use half the amount listed in the recipe when you do!
- Whole Milk. You can replace the whole milk in this recipe with the same amount of plant-based milk of your choice. I recommend coconut milk to pair with the Thai tea flavors!
- Eggs. You can also used boxed egg whites. You’ll need around ¾ cups (6 ounces or 170 grams) if you do.
- Sweetened Condensed Milk. You can replace the sweetened condensed milk in the frosting with a non-dairy condensed milk. I recommend sweetened condensed coconut milk!
- Orange Food Coloring. I used the orange food coloring gel from this Americolor Nifty Fifty food gel set. In a pinch, you can skip the food coloring. However, your frosting will be white in color with just a hint of orange.
How To Make The Recipe
Here are the basic steps to make this Thai tea layer cake recipe from scratch:
First, make the Thai tea concentrate:
- Make the Thai tea concentrate. (Work Time: 10 minutes)
You’ll use the concentrate in both the cake and frosting recipe. You can make the Thai tea concentrate for up to 3 days in advance. Follow the recipe instructions to make the concentrate, then refrigerate it in an airtight container.
Then, make the Thai tea cakes:
- Prep your ingredients for the cake. (Prep Time: 5 minutes)
It’s especially important that your butter, milk, and egg whites are warmed to room temperature. The batter will curdle if some of the ingredients are colder than others. Check out my article in Bon Appetit magazine with some tips and tricks on how to do so quickly! - Make the cake batter. (Work Time: 15 minutes)
The cake recipe uses the reverse creaming method to make the cake batter. Learn more in the FAQ. - Bake the cakes. (Bake Time: 40 minutes)
- Cool the cakes.
The cakes need to be cooled completely before frosting. Cooling can take a while, so I usually make the cakes a day before making the frosting and assembling the cake. Learn more in the section titled “Best Recipe Tips”!
Next, make the sweetened condensed milk frosting:
- Prep the ingredients for the sweetened condensed milk frosting. (Prep Time: 5 minutes)
Again, make sure to bring all the ingredients to room temperature beforehand. - Make the sweetened condensed milk frosting. (Work Time: 5 minutes)
Then, start assembling the cake layers:
- Assemble the cake layers. (Work Time: 5 to 10 minutes)
Make the cake by stacking a layer on a cake board, covering its top with around ½ cup of frosting, and then placing the other cake on top of it. If you want to go the extra mile, you can level your cake tops, too (but I’m lazy and usually skip this step). - Crumb coat the cake. (Work Time: 15 to 30 minutes)
A crumb coat is a thin layer of frosting that’s spread over the naked cake to trap crumbs. If you’ve ever tried to frost a cake without a crumb coat, you’ll know that crumbs can shake loose from the cake and get caught in the frosting, leaving your cake with unsightly bumps. The crumb coat seals in any crumbs, allowing you to apply thicker and smoother layers of frosting later.You can skip this step for a more rustic cake like mine. But if you want perfectly smooth frosting on the sides and top, crumb coat your cake!
Finally, frost and finish the cake:
- Cover and smooth the cake completely with the sweetened condensed milk frosting. (Work Time: 30 to 60 minutes)
Use the offset spatula to spread the frosting all over the top and sides of the cake evenly. It’s up to you how you want to frost it—you can go for a smooth and polished look, or a more rustic look like mine.

Recipe Troubleshooting and FAQ
Do I need special tools to make this recipe?
Sort of. If you bake cakes regularly, it’s likely that you already have the main tools you need for this Vietnamese iced coffee cake: a round cake board, a rotating cake stand and an offset spatula.
Why does the recipe instruct me to add butter to the dry ingredients? Usually, cake recipes instruct me to cream butter and sugar together (then add the dry ingredients).
Good question! That’s because this recipe uses the reverse creaming technique. The reverse creaming technique was invented by baking goddess Rose Levy Berenbaum. It’s the secret to getting a velvety cake texture similar to boxed cake mix (but minus the artificial ingredients).
Can you freeze the cake?
Yes! You can freeze it in the following ways:
Freeze the baked, unfrosted cake layers.
Follow the recipe instructions for making and baking the cake layers. Once the layers have cooled, tightly wrap each cake layer in its own individual sheet of plastic wrap. Freeze for up to 3 months. To use in the recipe, there’s no need to thaw the cakes! Simply set the cake layers out on the counter as you make the sweetened condensed milk frosting to let them thaw slightly. Use in the recipe as directed.
Freeze the entire assembled cake.
You can freeze the entire assembled cake, too! However, doing so works best if you use a cake board. Refrigerate the entire assembled cake, uncovered, for a minimum of 4 hours. Doing so sets the frosting and preps it for freezing. After 4 hours, test the cake by gently poking the frosting with your finger. Poke it gently! You don’t want to leave an indent, you just want to swipe it gently to see if any frosting comes off. If no frosting comes off onto your finger, the cake is ready.
Carefully cover the whole thing—cake board and all—in two layers of plastic wrap. Freeze for up to 3 months. To serve, transfer to the refrigerator overnight to thaw, then let stand at room temperature for 1 to 2 hours before serving.
Freeze any leftover slices of cake.
Tightly wrap any leftover slices of cake in plastic wrap and freeze for up to 3 months. Follow the instructions above to thaw and enjoy!
Best Recipe Tips
Tips About Ingredients
- After making the Thai tea concentrate, pour it into a measuring cup to make sure you have the quantity needed for the recipe. Sometimes the leaves can absorb too much liquid, leaving you with less tea than needed. You can press the tea leaves to try and strain more liquid from the soaked leaves, or make your life easier by re-steeping the leaves again! If you go this route, just the same amount of boiling water (1 ½ cups), re-steep the leaves, and pouring it out into the measuring cup once more. You’ll likely end up with more than what’s needed for the recipe, but you can just use the leftovers to make a Thai iced tea drink for yourself!
- I recently discovered that you don’t really need to sift confectioners’ sugar when making frosting. Because you’ll be mixing the frosting at high speed, most of the lumps in these ingredients work themselves out pretty easily! Save yourself time and energy—don’t bother sifting the confectioners’ sugar unless it’s REALLY necessary.
Making The Recipe Fit Your Schedule
- When making any kind of layer cake recipe, I always make the cake layers a day ahead of assembling the entire cake. Doing so ensures that I’m not stuck in the kitchen all day waiting for the layers to cool in order to frost and assemble the entire thing!
If you want to take this route, I suggest making the cake layers a day ahead of making the frosting and assembling the cake. Let the cakes cool to room temperature, then wrap them in two tight layers of plastic wrap. Freeze overnight. Freezing the cakes will keep them fresh, and make the cakes easier to work with when assembling the cake the next day. And when ready to assemble the next day, thaw the cakes slightly by placing them on the counter at room temperature while you make the frosting.
PS—if you like this kind of make-ahead, splitting-the-work-up-so-you’re-not-stuck-in-the-kitchen-all-day, DEFINITELY check out my cookbook. Recipes for intermediate bakes like layer cakes, pies, and more are written this way to help you bake around your schedule!
Get the Recipe:
Thai Tea Layer Cake with Sweetened Condensed Milk Frosting
Servings: 1 (8-inch) double layer cake
This Thai Tea layer cake is made with two layers of Thai tea infused sponge cake, topped with sweetened condensed milk frosting!
Prevent your screen from going dark
For The Thai Tea Concentrate
For The Sweetened Condensed Milk Frosting
-
First, make the Thai tea concentrate. In a medium bowl, whisk together the Thai tea and boiling water. Let steep for 5 minutes.Place a fine-mesh sieve over a large liquid measuring cup. Strain out the tea leaves by pouring the concentrate through the sieve into the measuring cup, using a rubber spatula to gently press the leaves against the sieve to strain them further. You should have around 1 ½ cups Thai tea concentrate.Cool to room temperature before using in the cake batter and frosting recipes.
-
Prep the oven and pans to make the Thai tea cake. Position a rack in the center of the oven and preheat the oven to 350°F. Generously spray two 8-inch round cake pans with cooking spray and line the bottom of each with a parchment paper circle. Spray the parchment, too.
-
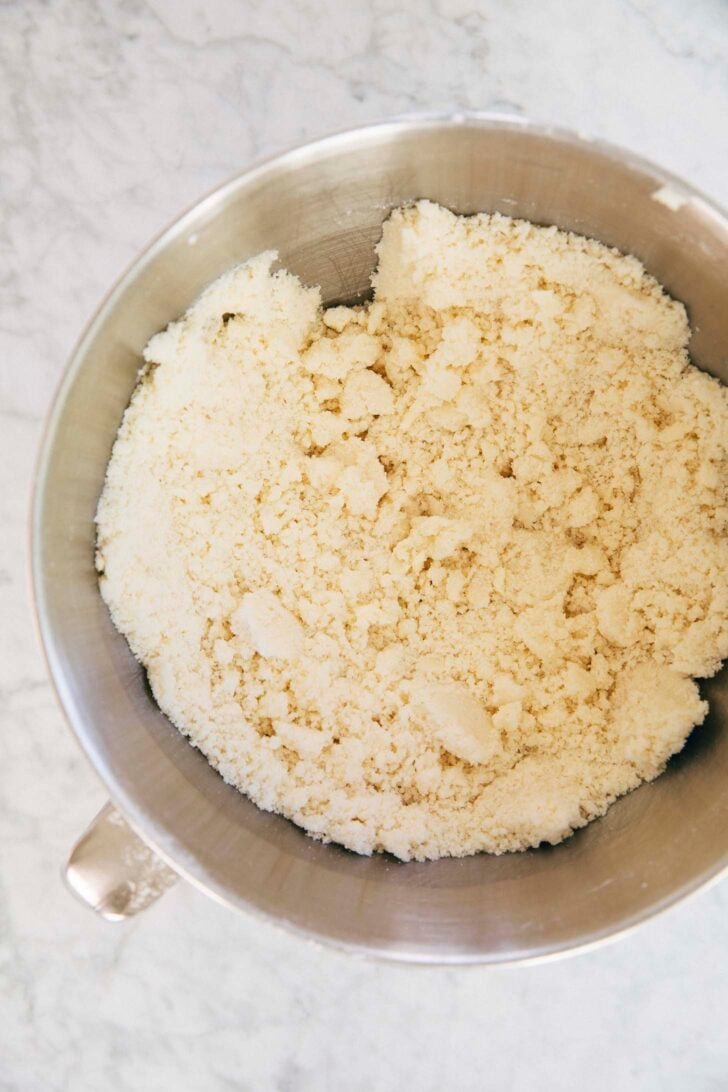
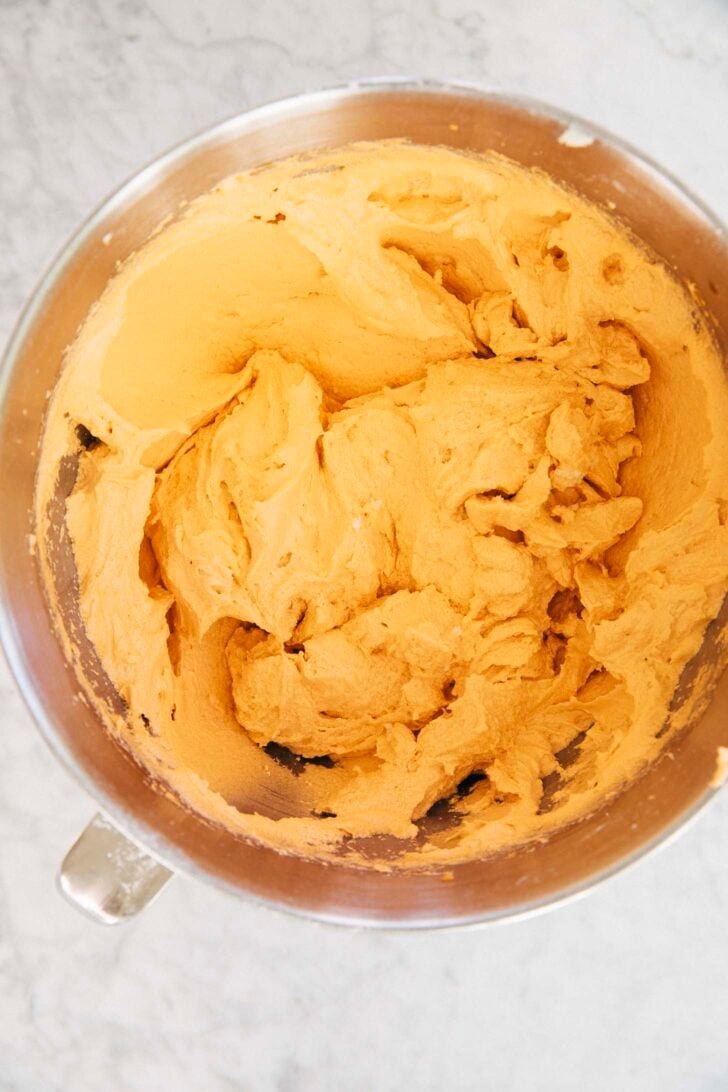
Make the cake batter. In the bowl of a stand mixer fitted with the paddle attachment, combine the flour, sugar, baking powder, and salt for the cake. Beat on low until just combined about 15 seconds. Add the butter for the cake all at once and beat on low until the mixture has the texture of coarse meal, with pea-sized pieces of butter throughout, about 3 minutes.Add the Thai tea for the cake and increase the mixer speed to medium. Beat until the batter is light and fluffy, about 2 minutes, using a rubber spatula to scrape down the bottom and sides of the bowl as necessary.While the batter is mixing, whisk together the egg whites, milk, and vanilla for the cake in a large liquid measuring cup. Reduce the mixer to low and add the egg white mixture in three additions, scraping down the bottom and sides of the bowl after each addition, then beat until just combined.
-
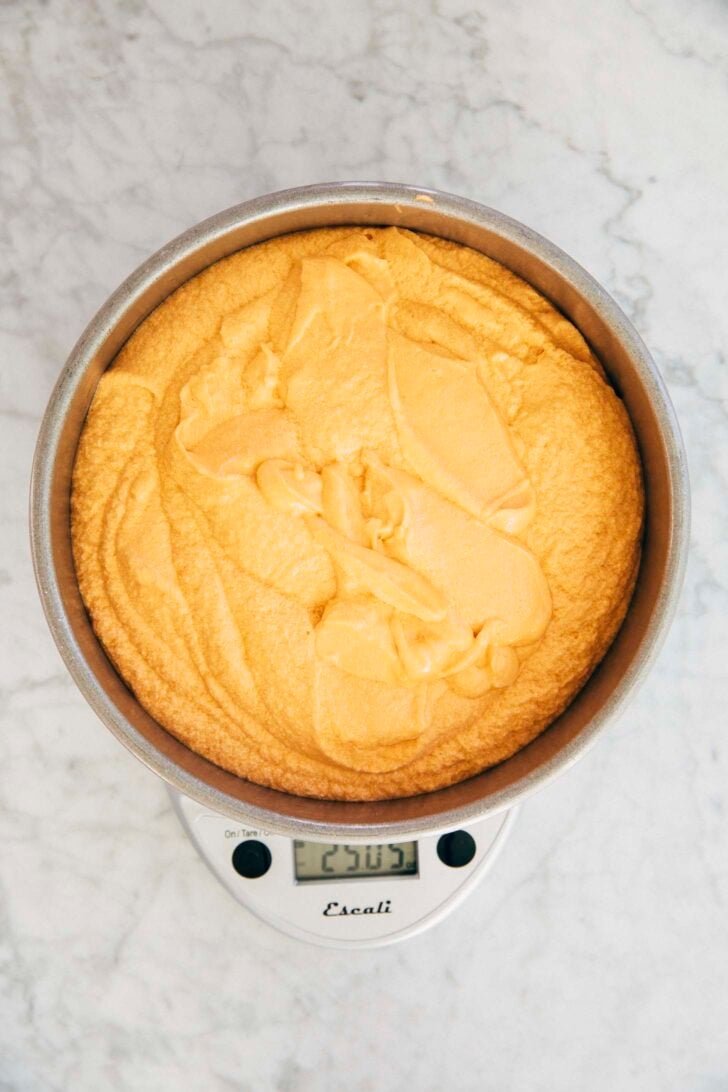
Assemble the cake layers. Divide the batter evenly between the pans; if using a digital scale to measure out the layers, note that this recipe makes around 50 ounces (1417 grams) of batter. Pour 25 ounces (709 grams) of batter into each pan.
-
Bake the cakes. Bake for 40 minutes. When done, the top of the cake should bounce back when gently pressed and a skewer inserted into the center of the cake should come out with a few crumbs attached. Cool completely in the pans on a wire rack before frosting.
-
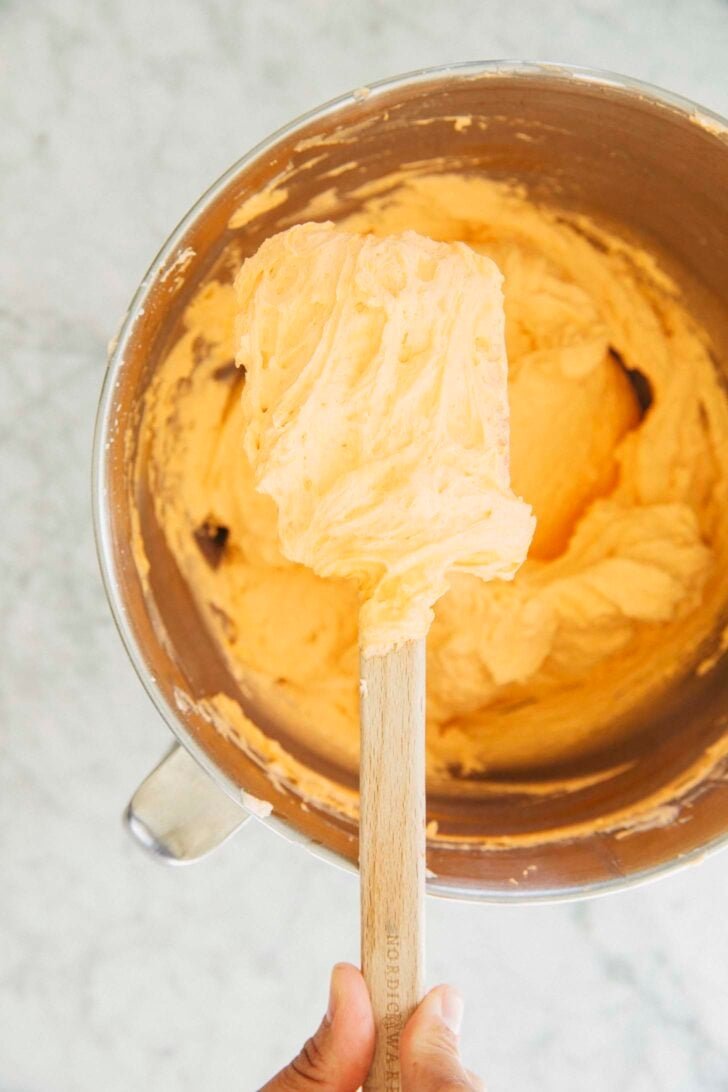
Make the sweetened condensed milk frosting. In the bowl of a stand mixer fitted with the paddle attachment, beat the butter, vanilla, and salt for the frosting on medium-low until smooth and creamy, about 1 minute. Reduce the mixer to low and add the confectioners’ sugar 1 cup at a time, beating until combined. Scrape down the bottom and sides of the bowl with a rubber spatula. In a small liquid measuring cup, whisk together the sweetened condensed milk, Thai tea, and orange food coloring. With the mixer on low, slowly pour in the mixture and beat until just combined. Scrape down the bottom and sides of the bowl once more, then beat on medium-high until the frosting is creamy and smooth, 2 to 3 minutes. Use immediately.
-
Assemble the cake. If necessary, level the top of both cakes. Place one of the cake layers on a cake board or serving platter in the center of a rotating cake stand. Use a rubber spatula or cookie dough scoop to drop ½ cup of frosting in the middle of this cake layer. Spread it evenly all over the top, just like you would spread butter on toast. Place the second cake on top of this frosting, stacking it evenly on top of the first cake.
-
Crumb coat the cake. Cover the surface of the entire layer cake with a thin layer of frosting. Use just enough frosting to cover the entire cake completely. Refrigerate, uncovered, for 30 minutes to stiffen and “set” the frosting.
-
After the crumb coat sets, finish frosting the cake. Cover the cake completely with the remaining frosting, using an offset spatula to spread the frosting all over the top and sides of the cake evenly.
-
Serve and store. Serve immediately. The assembled cake can be stored at room temperature, under a cake dome or a large bowl turned upside down, for up to 1 day. Press a sheet of plastic wrap against any cut surfaces to prevent the cake from drying out. After that, cover the entire cake loosely with plastic wrap and refrigerate for up to 2 days.
- After making the Thai tea concentrate, pour it into a measuring cup to make sure you have the quantity needed for the recipe. Sometimes the leaves can absorb too much liquid, leaving you with less tea than needed. You can press the tea leaves to try and strain more liquid from the soaked leaves, or make your life easier by re-steeping the leaves again! If you go this route, just the same amount of boiling water (1 ½ cups), re-steep the leaves, and pouring it out into the measuring cup once more. You’ll likely end up with more than what’s needed for the recipe, but you can just use the leftovers to make a Thai iced tea drink for yourself!
- I recently discovered that you don’t really need to sift confectioners’ sugar when making frosting. Because you’ll be mixing the frosting at high speed, most of the lumps in these ingredients work themselves out pretty easily! Save yourself time and energy—don’t bother sifting the confectioners’ sugar unless it’s REALLY necessary.
- When making any kind of layer cake recipe, I always make the cake layers a day ahead of assembling the entire cake. Doing so ensures that I’m not stuck in the kitchen all day waiting for the layers to cool in order to frost and assemble the entire thing!
If you want to take this route, I suggest making the cake layers a day ahead of making the frosting and assembling the cake. Let the cakes cool to room temperature, then wrap them in two tight layers of plastic wrap. Freeze overnight. Freezing the cakes will keep them fresh, and make the cakes easier to work with when assembling the cake the next day. And when ready to assemble the next day, thaw the cakes slightly by placing them on the counter at room temperature while you make the frosting.
PS—if you like this kind of make-ahead, splitting-the-work-up-so-you’re-not-stuck-in-the-kitchen-all-day, DEFINITELY check out my cookbook. Recipes for intermediate bakes like layer cakes, pies, and more are written this way to help you bake around your schedule!
buy the book
Weeknight Baking:
Recipes to Fit your Schedule
Over the past several years of running Hummingbird High, I kept a crucial aspect of my life hidden from my readers: I had a full-time, extremely demanding job in the tech world. In my debut cookbook, Weeknight Baking, I finally reveal the secrets to baking delicious desserts on a tight schedule.
")
")