


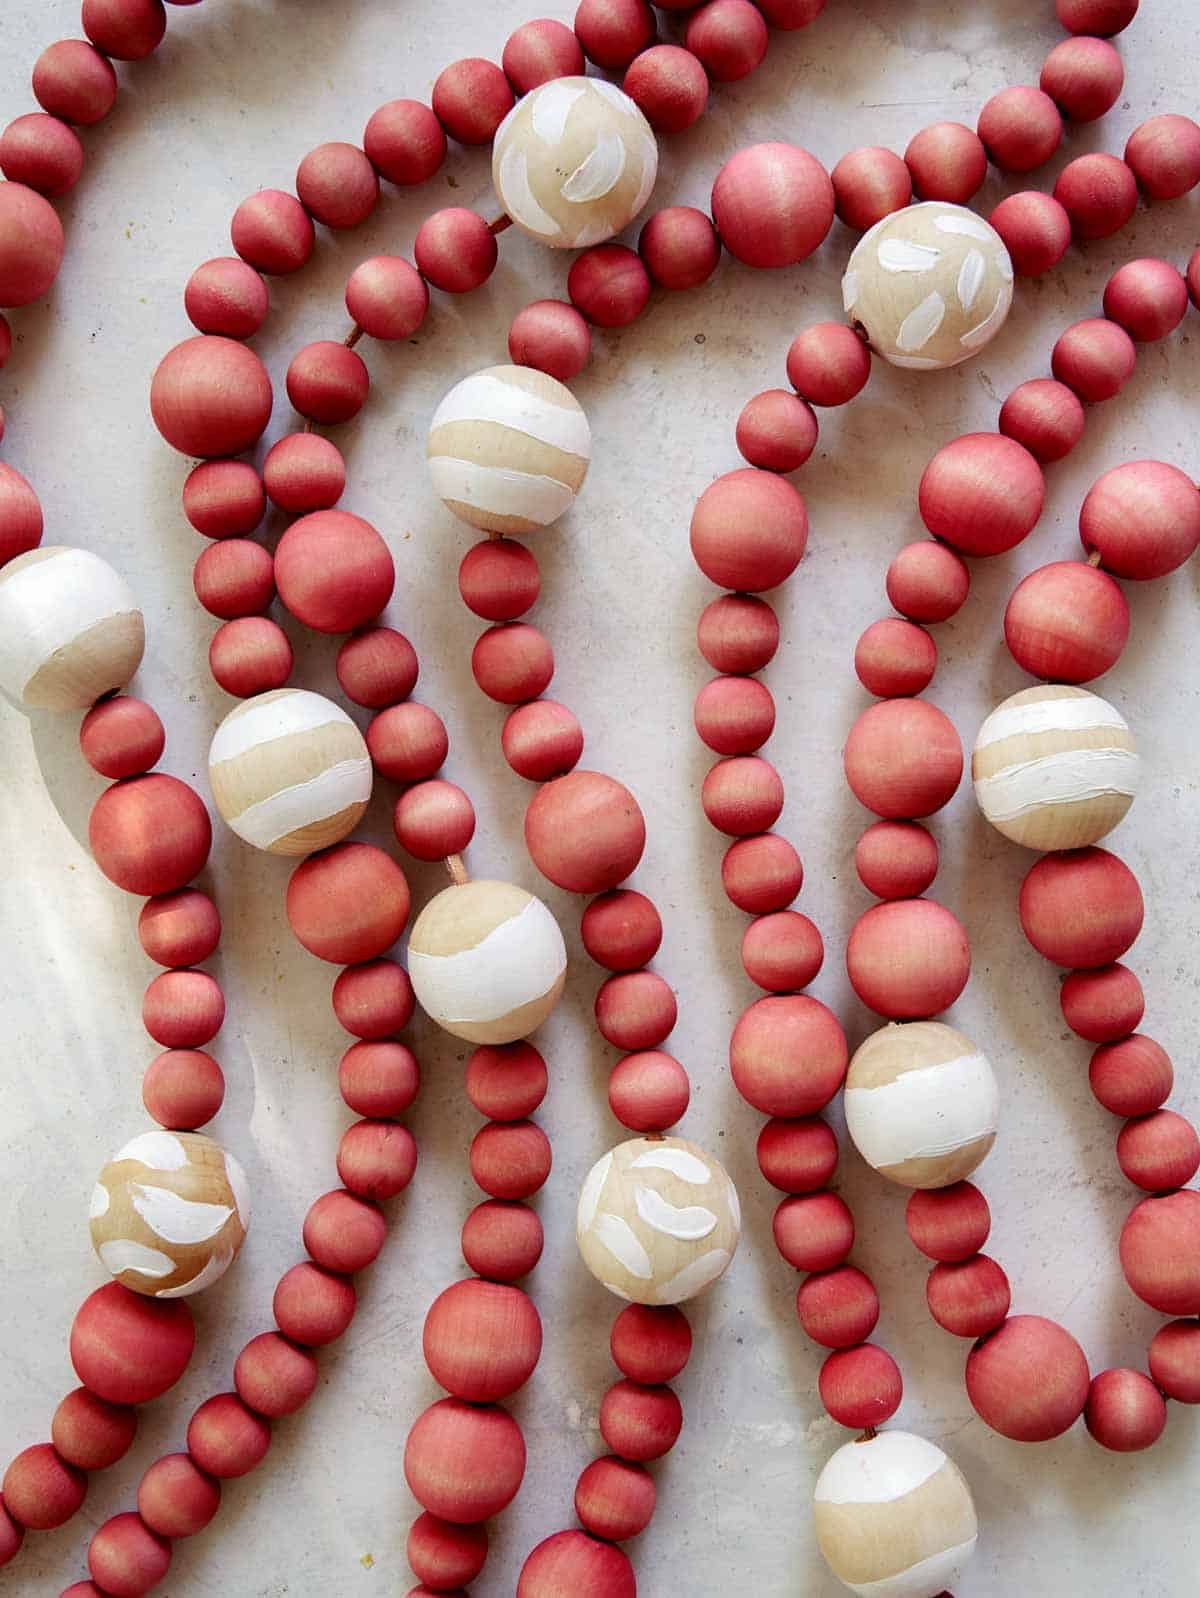
Hi! We are back with another DIY for this Holiday season. This time we have a really simple DIY Wood Bead Christmas Garland. I have just had this idea in my head for most of the year, and really wanted to just do it because I really wanted a garland for my mantle. I really wanted to make a simple garland, but not be too colorful, just simple looking and natural. I decided to dye wood beads, and then also mix in some large painted wood beads. This is really a simple and stunning DIY, and I hope you might consider giving this one a go.
Supplies
Process
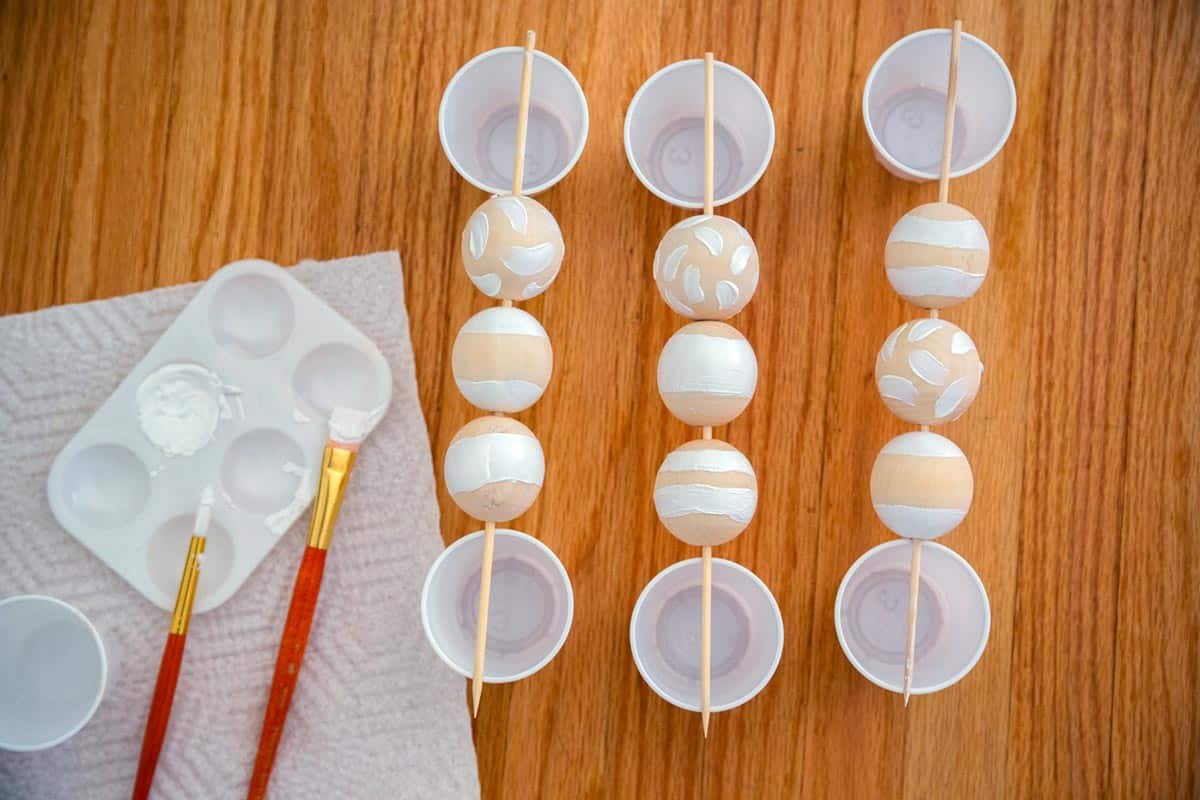
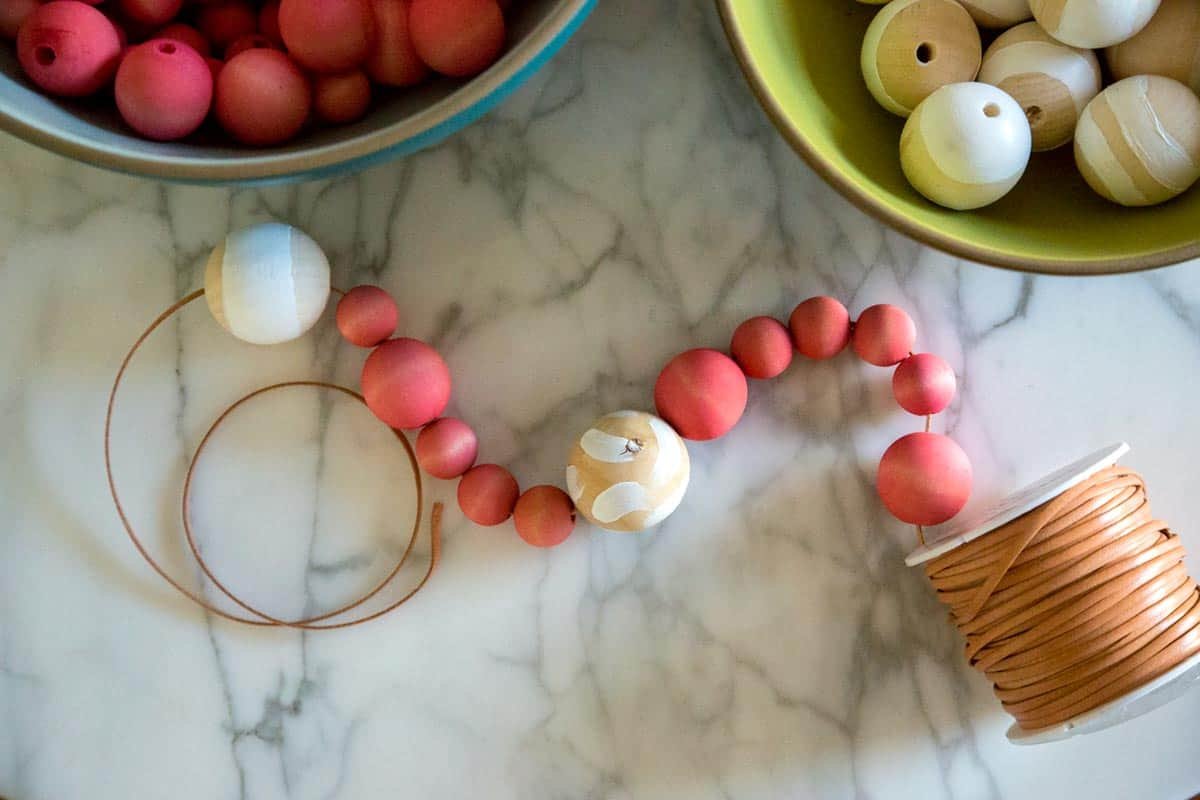
- For painted beads: Gather the beads you want to paint. Paint them with the designs you prefer then thread onto skewers, and suspend in the air by balancing the skewers on the top of a cup to dry.
- Dye beads with rit dye. This is easier if they are pre – strung. Mix dye in a bowl with hot water and let soak for 1 minute (or longer depending on color intensity preference). Rinse with cold water and hand to dry.
- String garland onto leather string and tie it off on the end.


DIY Wood Bead Christmas Garland
INSTRUCTIONS
To Dye Beads Red:
-
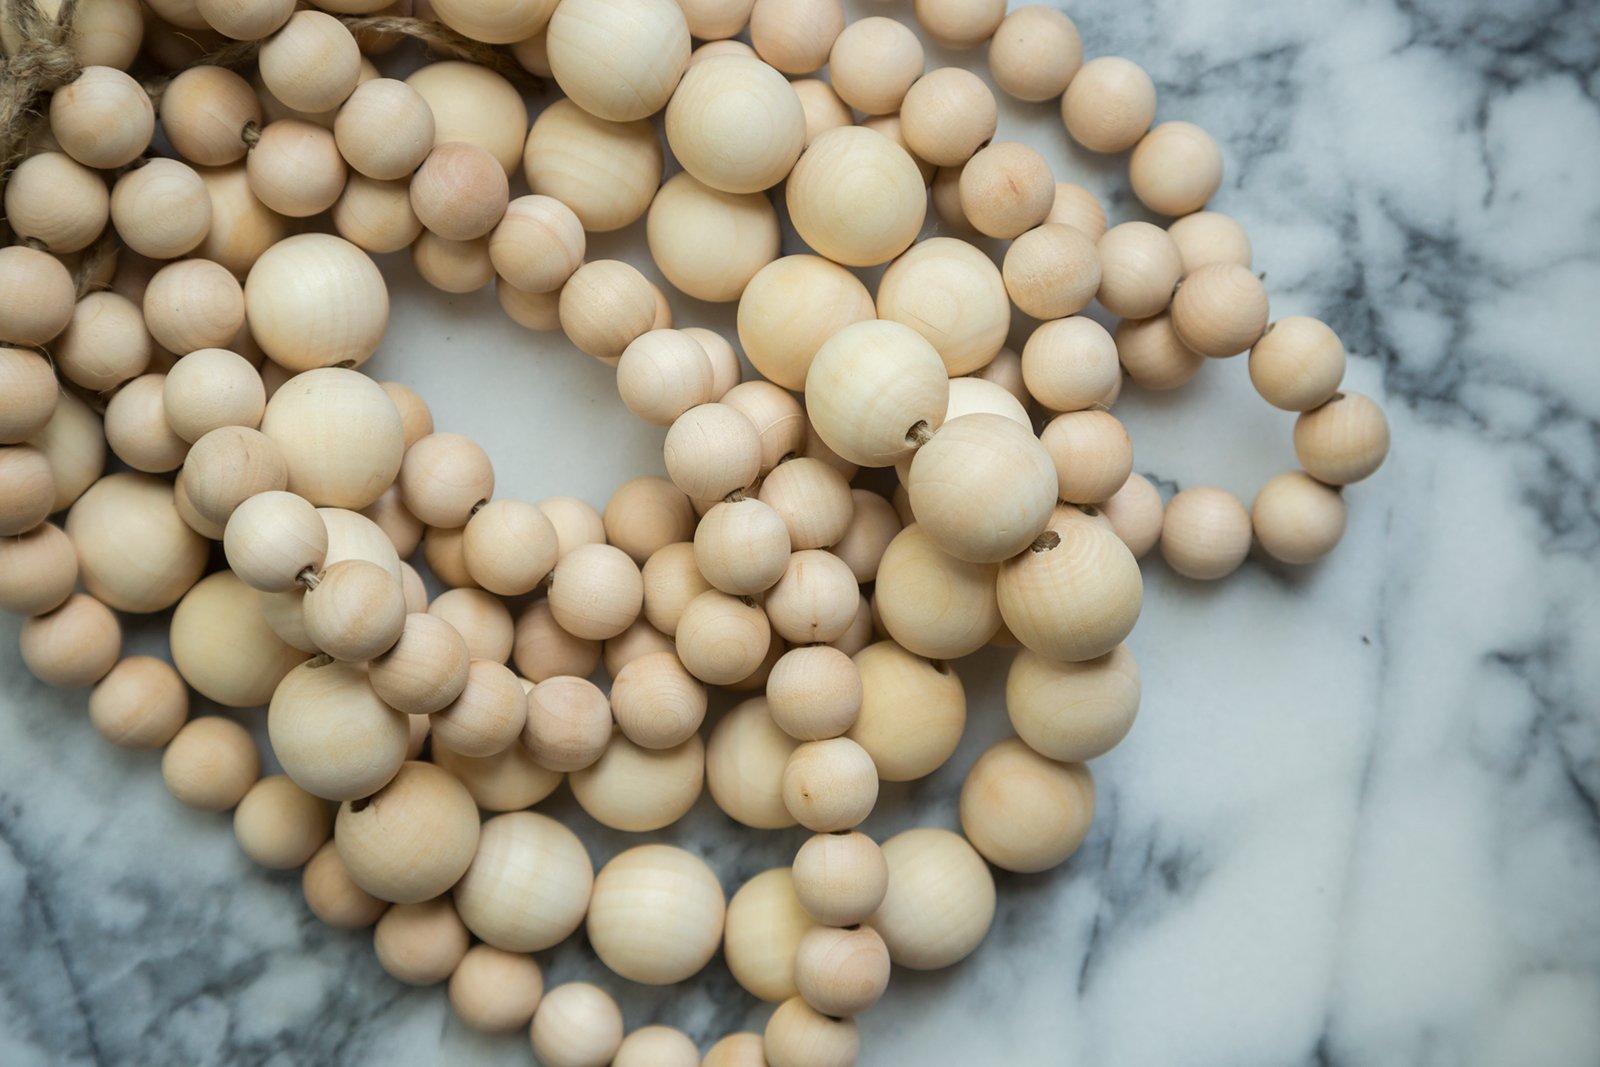
String all your wood beads onto a string. It really can be any kind of string, in my situation I used twine. This baked the dying portion easy because all the beads in one bath get dipped more consistently.
-
Get ready to dye: Line your work surface with plastic or several sheets of newspaper or paper towels, have a few paper towels laid out nearby to wipe up any spills and/or blot your gloved hands before you touch things. Put on your gloves. To mix, I used 2 overflowing tbsp of dye to about 3 cups of HOT water. You can either microwave, covered with plastic wrap, for a couple minutes (check after 1 min) or use a tea kettle and measure out with a glass measuring cup. Stir thoroughly with a metal spoon.
-
Take the beaded string and submerge it in the dye, hold under and agitate gently. Take it out and let the excess dye drip back into the bowl.
-
Rinse the beaded string thoroughly in a sink under cold running water.
-
Hang to dry for a couple of hours. You don’t want to beads to be wet or they will rub off coloring onto the leather.
Make Garland
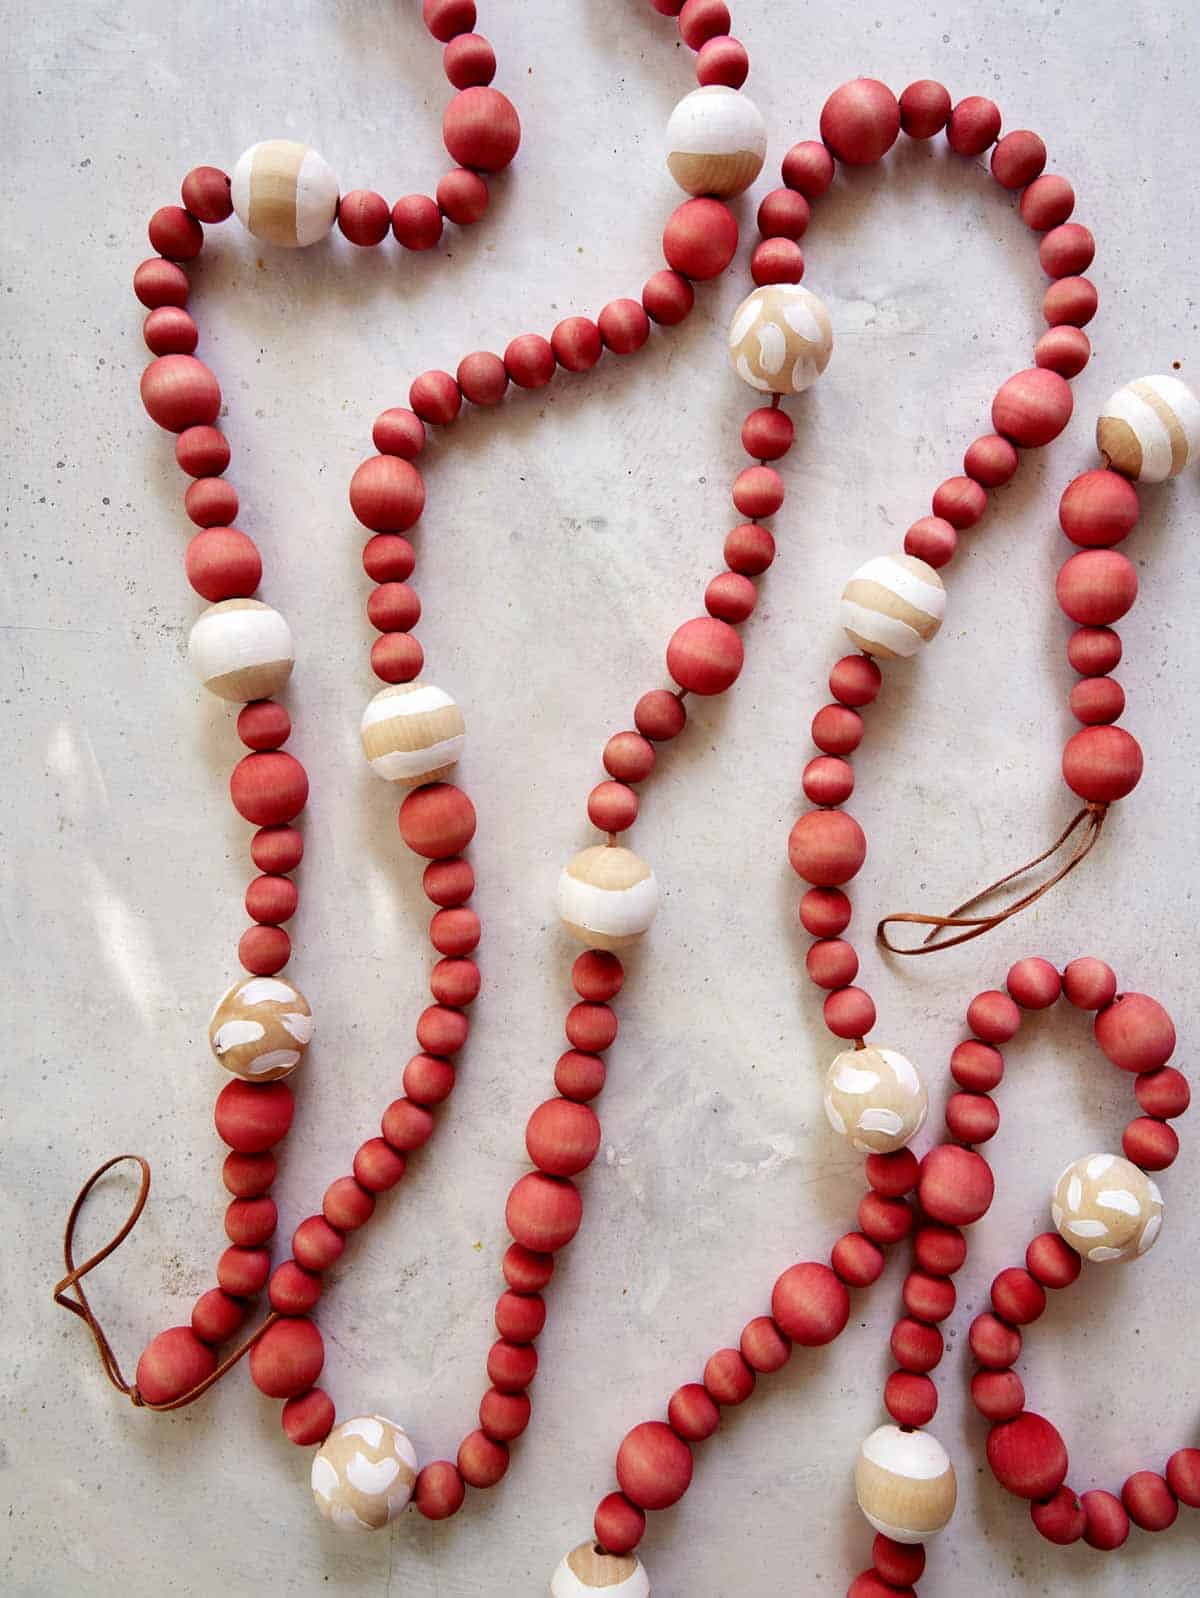
-
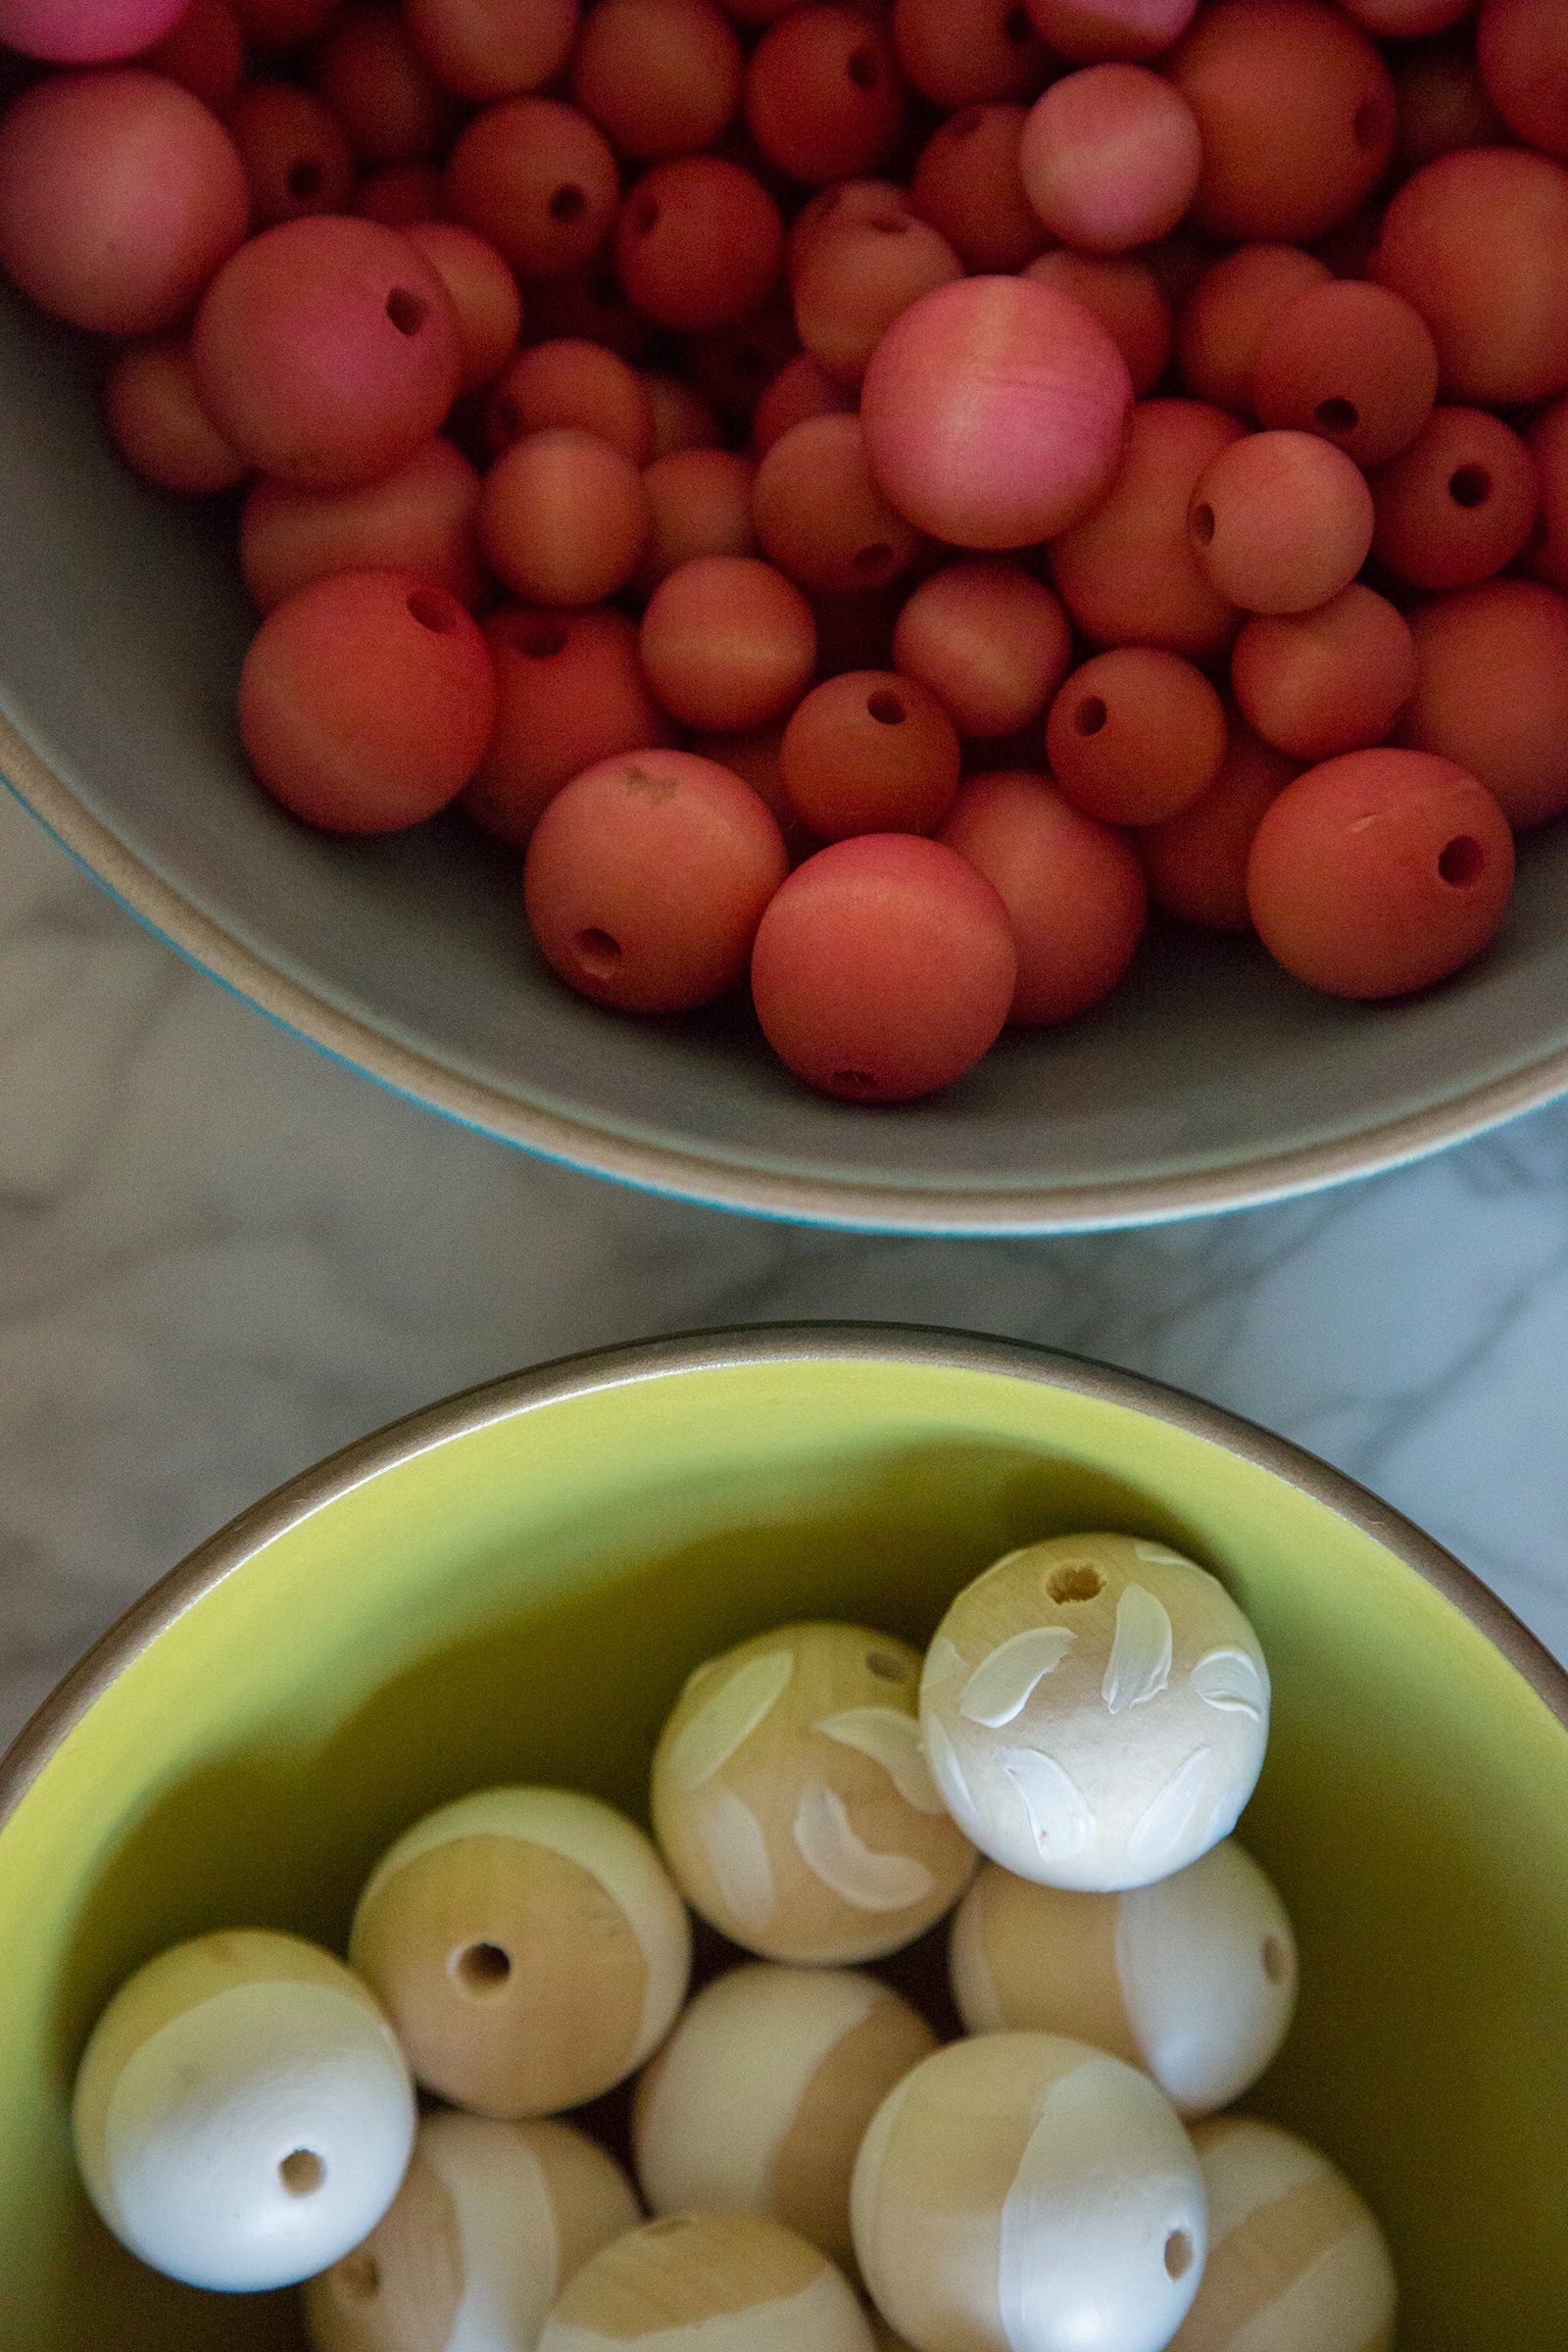
String your painted beads and dyed beads in a random order onto your leather string. Once you have string everything, watch this very helpful tutorial very carefully and learn how to tie a perfect loop knot.
-
Hang and enjoy your super cute Christmas garland. YAY!
NOTES
For dyeing:
I recommend you dye a test bead first to see if your mixture is how you want it. If it’s too dark, add more water. If it’s too light, add more dye. The wood will appear slightly lighter when dry. Generally, the longer you leave it in, the more saturated it will be.
KEYWORD: christmas, christmas decor, decor, DIY, garland
About Teri Lyn Fisher
Reader Interactions
")
")