

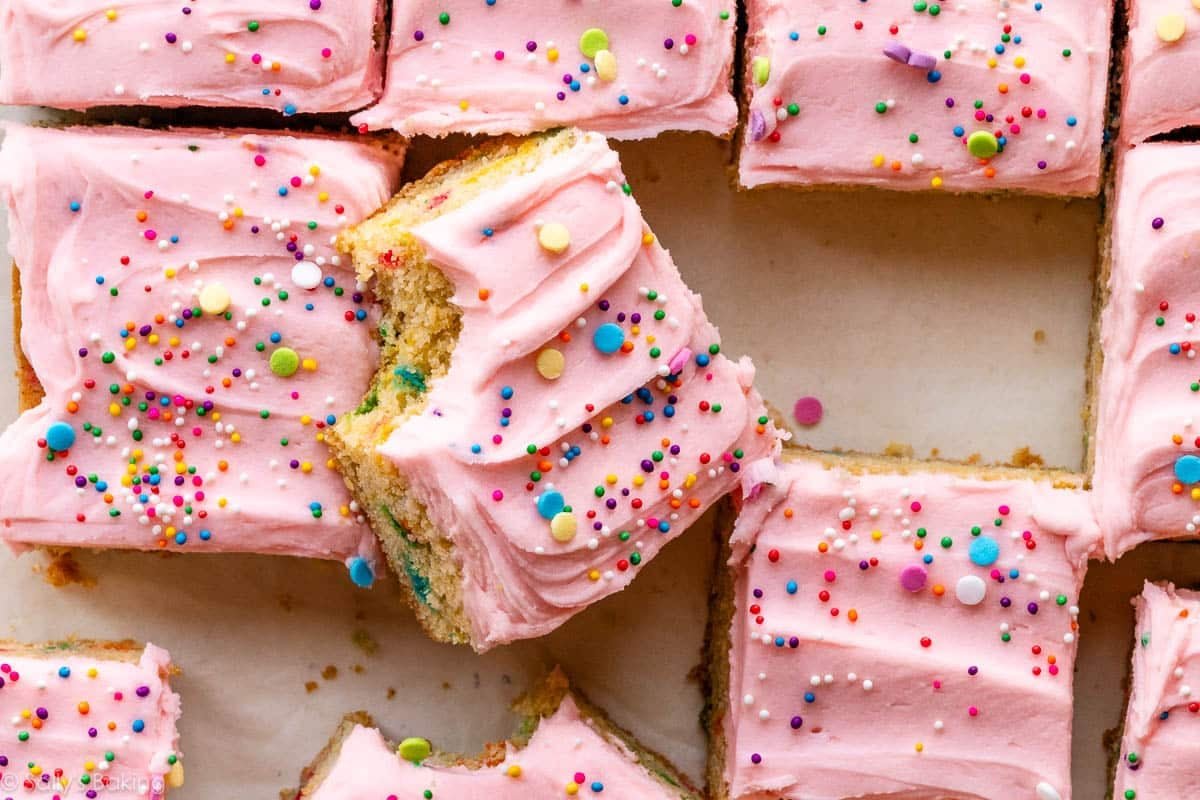
If you love soft frosted sugar cookies but don’t love rolling, cutting, and decorating dozens of individual cookies, these sugar cookie bars are the answer. They’re buttery, extra soft, wonderfully chewy, and topped with a thick layer of creamy vanilla buttercream and colorful sprinkles. Best of all, there’s no cookie dough chilling required, making them a quick and easy dessert for birthdays, holidays, and celebrations year-round.

I originally published this recipe in 2014 and have since updated it with new photos, a video tutorial, and additional success tips.
If you’re a fan of super-soft frosted sugar cookies, and love the chewy texture of sprinkle-filled chewy drop sugar cookies, these frosted sugar cookie bars combine the best of both!
Why You’ll Love These Sugar Cookie Bars
- No dough chilling required
- Thick, soft, and chewy centers
- Rich, buttery sugar cookie flavor
- Thick, fluffy vanilla buttercream
- Easy to customize with your favorite flavor of frosting and color of sprinkles
- Perfect for holidays and celebrations year-round
- Freezes beautifully
One reader, S, commented: “After years of making cupcakes, pies, cookies etc. for my friends, this is unanimously the favorite recipe of anything I’ve made. Each bite transports me back to being a child and having those youthful first experiences of sweets and birthday parties. ★★★★★“

Sugar Cookie Bar Ingredients
You only need a handful of basic baking ingredients for the cookie bars: flour, baking powder + baking soda, cornstarch, salt, butter, sugar, eggs, and vanilla + almond extracts. Plus rainbow sprinkles, of course!
These aren’t simply sugar cookies baked in a pan. Each ingredient is carefully chosen to create an exceptionally soft, tender texture that stays fresh for days.
A few notes about some of the key ingredients:
- Cornstarch: Just a small amount of cornstarch helps create an exceptionally tender sugar cookie bar. It keeps the cookie bars soft without making them cakey. It has the same job in chewy chocolate chip cookies.
- Butter: Be sure to start with proper room-temperature butter, which is still cool to the touch. If you’re a baking beginner, this post + video tutorial on how to cream butter and sugar together is a great place to start!
- Extra Egg Yolk: 1 egg binds everything together and 1 additional egg yolk adds richness, moisture, and chewiness. It’s one of my favorite tricks whenever I want cookies to stay soft for several days. Same story with these chocolate chip cookie bars.
- Sprinkles: Use jimmies-style sprinkles (the strands) in the dough, because nonpareils (the tiny balls) tend to bleed their color. Nonpareils are great for decorating the frosted bars, as pictured here with confetti quins (the flat discs).

Let’s Make Sugar Cookie Bars
This is an easy, straightforward recipe that’s wonderful for beginner bakers. Simply whisk together the dry ingredients in one bowl, then use a second bowl and an electric mixer to cream together butter and sugar. Mix in the remaining wet ingredients, add in the dry, and combine.
Expect a very sticky, thick dough:

What’s great about this recipe is that you don’t have to chill the cookie dough. Just press the dough into a lined pan and bake right away.
Success Tip: Flour your hands to help press the sticky dough into the pan. I used an offset spatula here, but floured hands work like a charm!

The key to soft sugar cookie bars is not overbaking them.
Bake until the edges are lightly golden and the center still looks a little underdone. This usually takes around 25 minutes. The bars will continue setting as they cool, giving you a soft, chewy texture instead of a dry one.


Vanilla Buttercream Frosting
We’re topping these bars with my favorite vanilla buttercream frosting recipe, only slightly scaled down. It’s sweet and fluffy, and I tinted it pink with a small drop of red gel food coloring. Tinting the frosting is completely optional.
As you can see, the frosting layer is just as thick as the cookie layer. In some spots, even thicker… and those were the best bites!! The frosting recipe as written makes a ton, so don’t be afraid to frost the bars with a heavy hand.
Top with rainbow sprinkles, or use different colored sprinkles to match a holiday theme.

Success Tips Summarized:
- Measure flour correctly by spooning and leveling or weighing with a kitchen scale.
- Use room-temperature ingredients. Room-temperature butter and egg incorporate more easily into the dough and create a more even texture.
- Line the baking pan with parchment paper for easy removal.
- Flour your hands to press the dough into the pan. It’s a sticky dough, and floured hands are the best tool for the job!
- Do not overbake. Pull the bars from the oven when the edges are lightly golden but the center still looks slightly underdone. They’ll continue setting as they cool, giving you perfectly soft bars instead of crumbly, fluffy ones. Think: the dense and chewy texture of brownies!
- The center of the bars will sink down a bit as they cool; that’s expected. If you’d like, you can gently press down the edges with the back of a spoon as soon as the bars come out of the oven, to make things a little more level.
- Wipe your knife clean between slices for neat squares.
Yes. Double all the ingredient amounts and bake in a lined 9×13-inch pan.
No. The dough is designed to bake immediately, making these much faster than traditional cut-out sugar cookies.
Yes. It simply adds that classic bakery-style sugar cookie flavor, but the bars are still delicious without it.
The most common reasons are too much flour or baking a few minutes too long. Measure your flour carefully and remove the bars from the oven while the center still looks underbaked.
Absolutely. The unfrosted cookie bars stay soft for a full day at room temperature before frosting. You can also: refrigerate frosted bars for up to 5 days; freeze unfrosted bars for up to 3 months; freeze individual frosted bars for quick treats.
These easy sugar cookie bars are perfect for birthdays, baby showers, holidays, bake sales, classroom parties, or anytime you’re craving that nostalgic bakery-style sugar cookie taste.
They’re simply everything you love about sugar cookies with none of the fuss: no dough chilling, no rolling, no individual cookie cutters, no special decorating skills or tools needed. 🙂

More Cookie Bar Flavors
Description
These frosted sugar cookie bars are soft, chewy, buttery, and topped with a thick layer of creamy vanilla buttercream frosting and colorful sprinkles. No dough chilling, rolling pin, or cookie cutters required.
- Make the bars: Preheat oven to 350°F (177°C). Line a 9-inch square pan or an 8-inch square pan with parchment paper, making sure to leave enough overhang on the sides. I use and prefer a 9-inch square pan. Set aside.
- In a medium bowl, whisk together the flour, baking powder, baking soda, cornstarch, and salt. Set aside.
- In a large bowl using a handheld mixer or stand mixer fitted with a paddle attachment, beat the butter and sugar together on medium-high speed until light and fluffy, about 3 minutes. Scrape down the sides and bottom of the bowl as needed. Beat in egg, egg yolk, vanilla, and almond extract (if using). Scrape down the sides and bottom of the bowl as needed.
- Add the dry ingredients to the bowl with the wet ingredients and beat on low speed until mostly incorporated, then increase to medium-high speed and beat until completely combined. The dough is thick and sticky. Finally, beat in the rainbow sprinkles.
- Press the cookie dough evenly into the prepared baking pan as best you can. Use a spatula or lightly floured hands to press evenly; it will seem like a thin layer of dough.
- Bake for 25–26 minutes or until very lightly browned around the edges. The center will still look very soft, that’s OK; the bars will continue to set as they cool. Do not over-bake.
- Allow the bars to cool completely in the pan set on a cooling rack. The center will slightly sink—that’s expected.
- Make the frosting: With a handheld or stand mixer fitted with a paddle attachment, beat the butter on medium speed until creamy, about 2 minutes. Add confectioners’ sugar, cream, and vanilla extract and beat on low speed for 30 seconds, then increase to medium-high speed and beat for 3 full minutes. Stop the mixer and scrape down the sides of the bowl as needed. Add more confectioners’ sugar if frosting is too thin or more cream if frosting is too thick. Taste; beat in a pinch of salt if the frosting is too sweet. Beat in food coloring, if using.
- Lift the cooled bars out of the pan by gripping the parchment paper overhang; transfer to a cutting board. Spread the frosting over the bars and decorate with extra sprinkles if desired. Cut into squares. Use a very sharp knife and wipe the knife between each cut for neat slices. Store bars in an airtight container at room temperature for up to 2 days or in the refrigerator for up to 5 days.
Notes
- Make Ahead Instructions: You can make these bars and the frosting 1 day in advance. Store the bars, covered, at room temperature overnight and store the frosting, covered, in the refrigerator. Bring the frosting to room temperature and give it a quick mix before using.
- Freezing Instructions: You can also freeze the frosted or unfrosted bars for up to 3 months. Thaw overnight in the refrigerator, frost if needed, cut, and serve.
- Special Tools (affiliate links): 9-inch Square Pan | Electric Mixer (Handheld or Stand) | Glass Mixing Bowl | Whisk | Silicone Spatula | Cooling Rack
- Cornstarch: Just a small amount of cornstarch helps create an exceptionally tender sugar cookie bar. It keeps the cookie bars soft without making them cakey. If you don’t have any, you can simply leave it out.
- Extra Egg Yolk: 1 egg binds everything together and 1 additional egg yolk adds richness, moisture, and chewiness. Do not skip.
- Sprinkles: Use regular rainbow sprinkles (aka “jimmies”) in the cookie bar base. Nonpareils (the little balls) will bleed their color in the dough. Save those for the topping, if desired.
- Cream: Cream or half-and-half makes for the creamiest, fluffiest frosting, but whole milk also works.
- Larger Batch: You can double this recipe and bake in a 9×13-inch pan; the bake time is about 35–40 minutes.
- Update in 2026: This recipe used to call for 1/2 teaspoon of baking soda but over the years, I have found that is simply too much. Use 1/4 teaspoon baking soda as instructed above, plus the 1 teaspoon baking powder.