
I basically survived on granola bars in high school. Pre-packaged, too sweet, milk chocolate granola bars at lunch and before volleyball practice. Every day. Naturally, I’ve been pretty burnt out on granola bars for the past ten years.
Then my friend Sara (whom I met through the blog) texted me the ingredients list for a granola bar and requested that I recreate them. I trust Sara’s taste in granola bars and thought I’d better give these a shot, so I stopped at the local coffee shop to pick one up.
I made it to my car before peeling off the packaging. One bite and I was hooked. This granola bar was unlike any other granola bar I’d ever encountered. I tasted honey, sea salt, dark chocolate, oats and cinnamon all at once—each flavor teetered on the edge of overwhelming the others yet somehow the sum was perfectly balanced.
Plus, unlike those packaged, processed granola bars I’d grown up eating, these were legitimately healthy granola bars. I immediately added the ingredients on the back of the package to my grocery list and headed to the store.
It took me five tries to get these granola bars just right. I initially thought they were baked because the oats weren’t entirely intact, but my baked bars were all wrong. Then I tried no-bake bars with old-fashioned oats. While the flavor was pretty spot on, the texture of the oats was too distracting.
Finally, it occurred to me to use quick-cooking oats—oats that have been rolled out thinner and cook in about 60 seconds—to get the right texture. Quick-cooking oats did just the trick and I delivered a bag of pre-packaged bars to Sara as a belated birthday gift.
I think you guys will appreciate these, too. The bars hold together well, although each batch I’ve made has turned out slightly different. I suspect the differences boil down to slight measuring discrepancies between the batches. For the firmest bars, you might need to sprinkle a few more oats into the bowl—enough that you think it’ll be almost impossible to mix them all in. Once you put some arm muscle into it and get those oats mixed in, you’re in business.
You might also want to tinker with the amount of salt. I’ve been using unsalted Trader Joe’s almond butter, which is nice and spreadable, plus I can control the salt content. I like my bars a little salty (and therefore totally addictive), so I go with the full 3/4 teaspoon, but you might want to scale back to suit your preferences. Feel free to change up the mix-ins, too. Check the recipe notes for details!
More Granola Bars to Try
You might also appreciate my popular granola recipe or overnight oats. Check out my 23 Healthy Make-Ahead Breakfast Recipes for more grab-and-go breakfast options.
Please let me know how your bars turn out in the comments! I love hearing from you.
Honey-Sweetened Almond Chocolate Chip Granola Bars
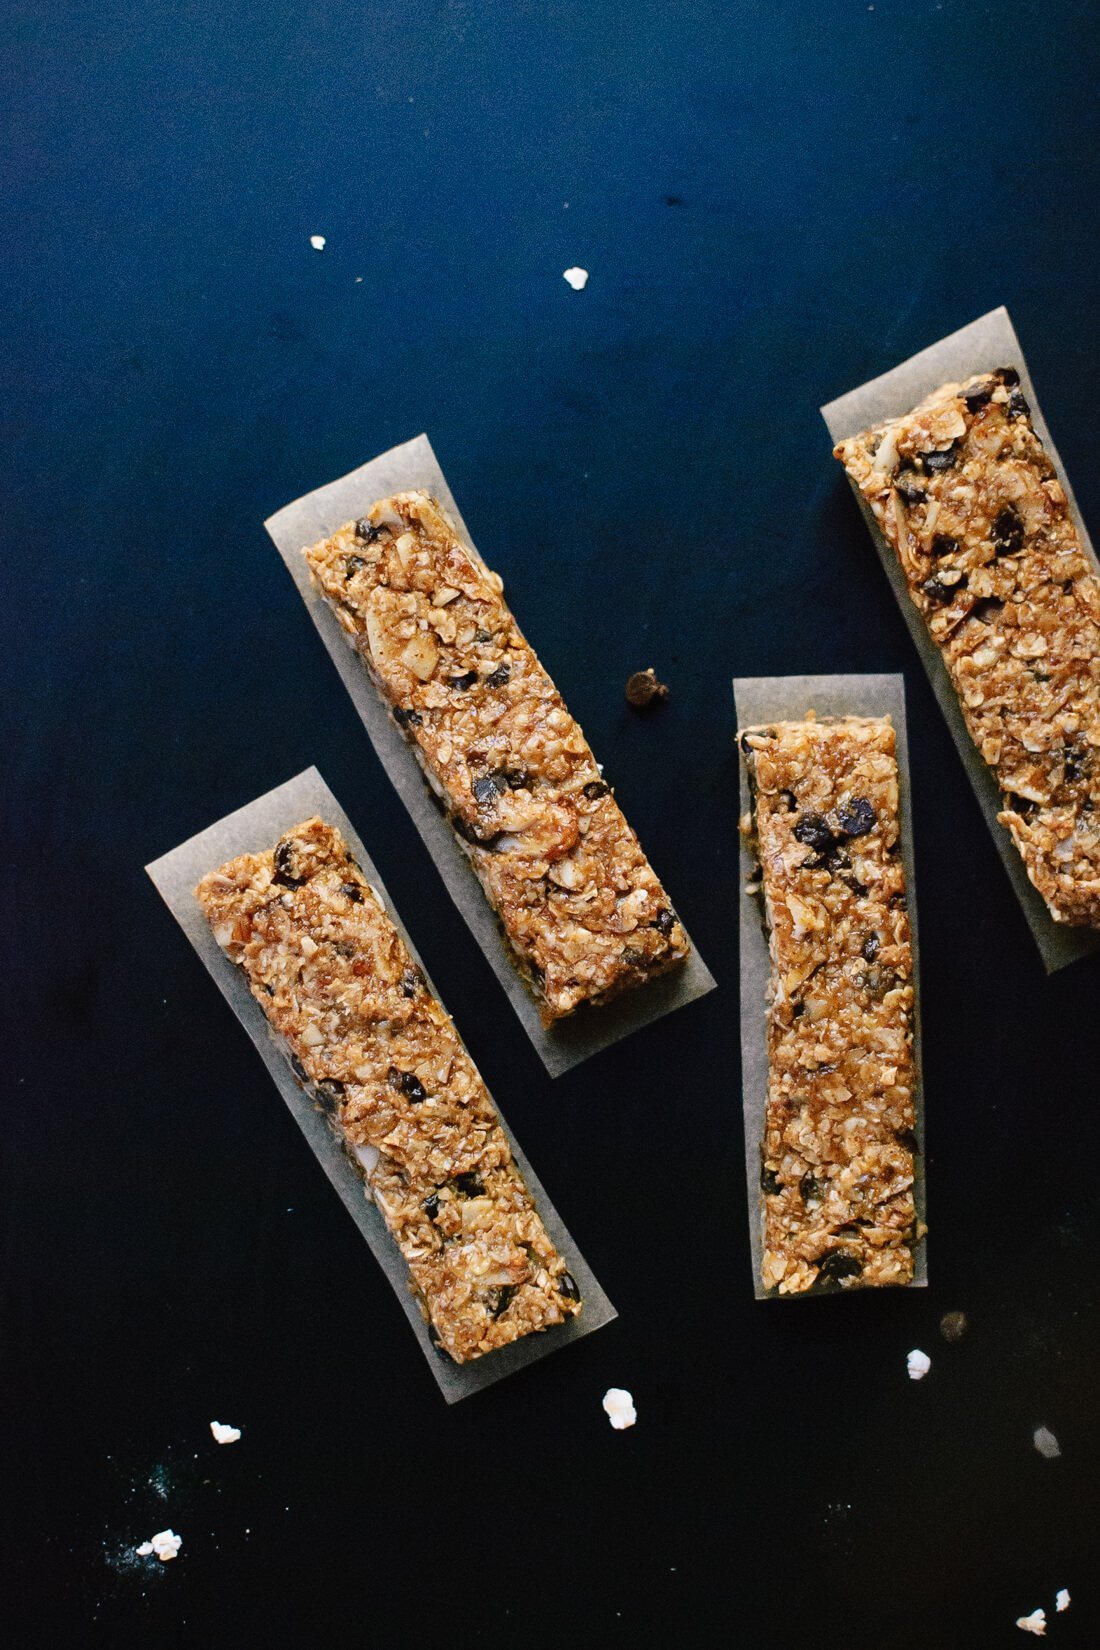
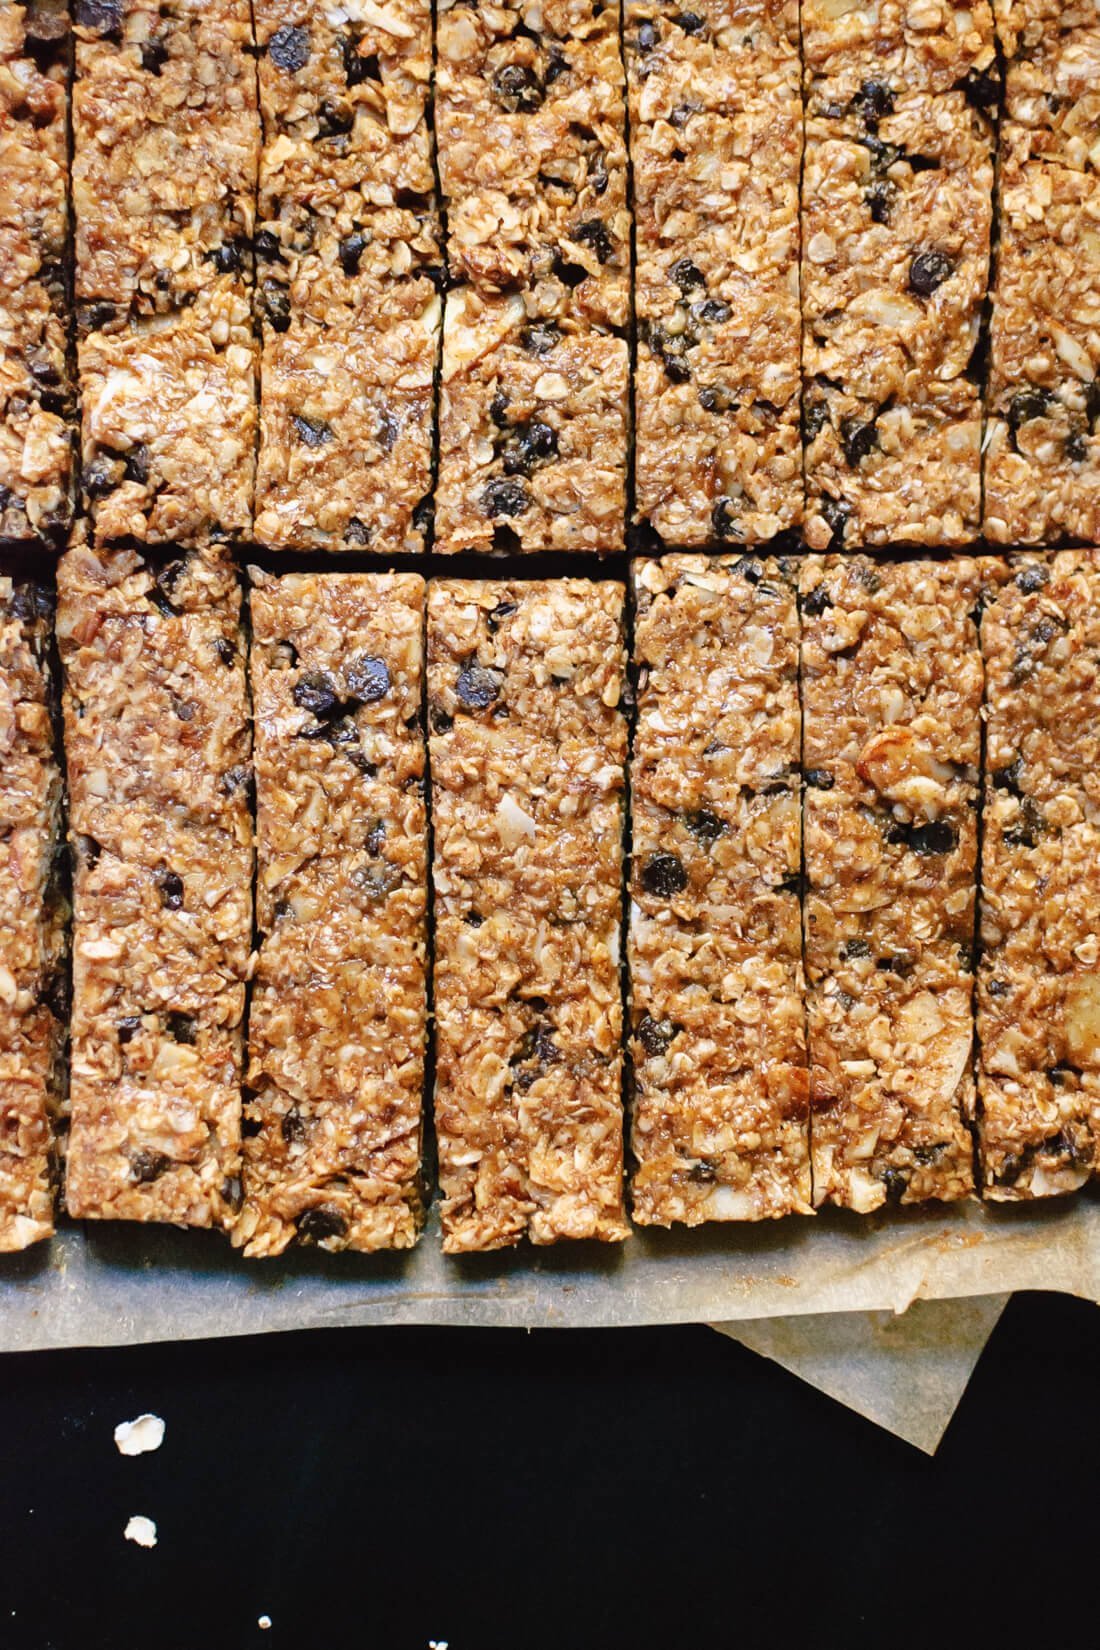
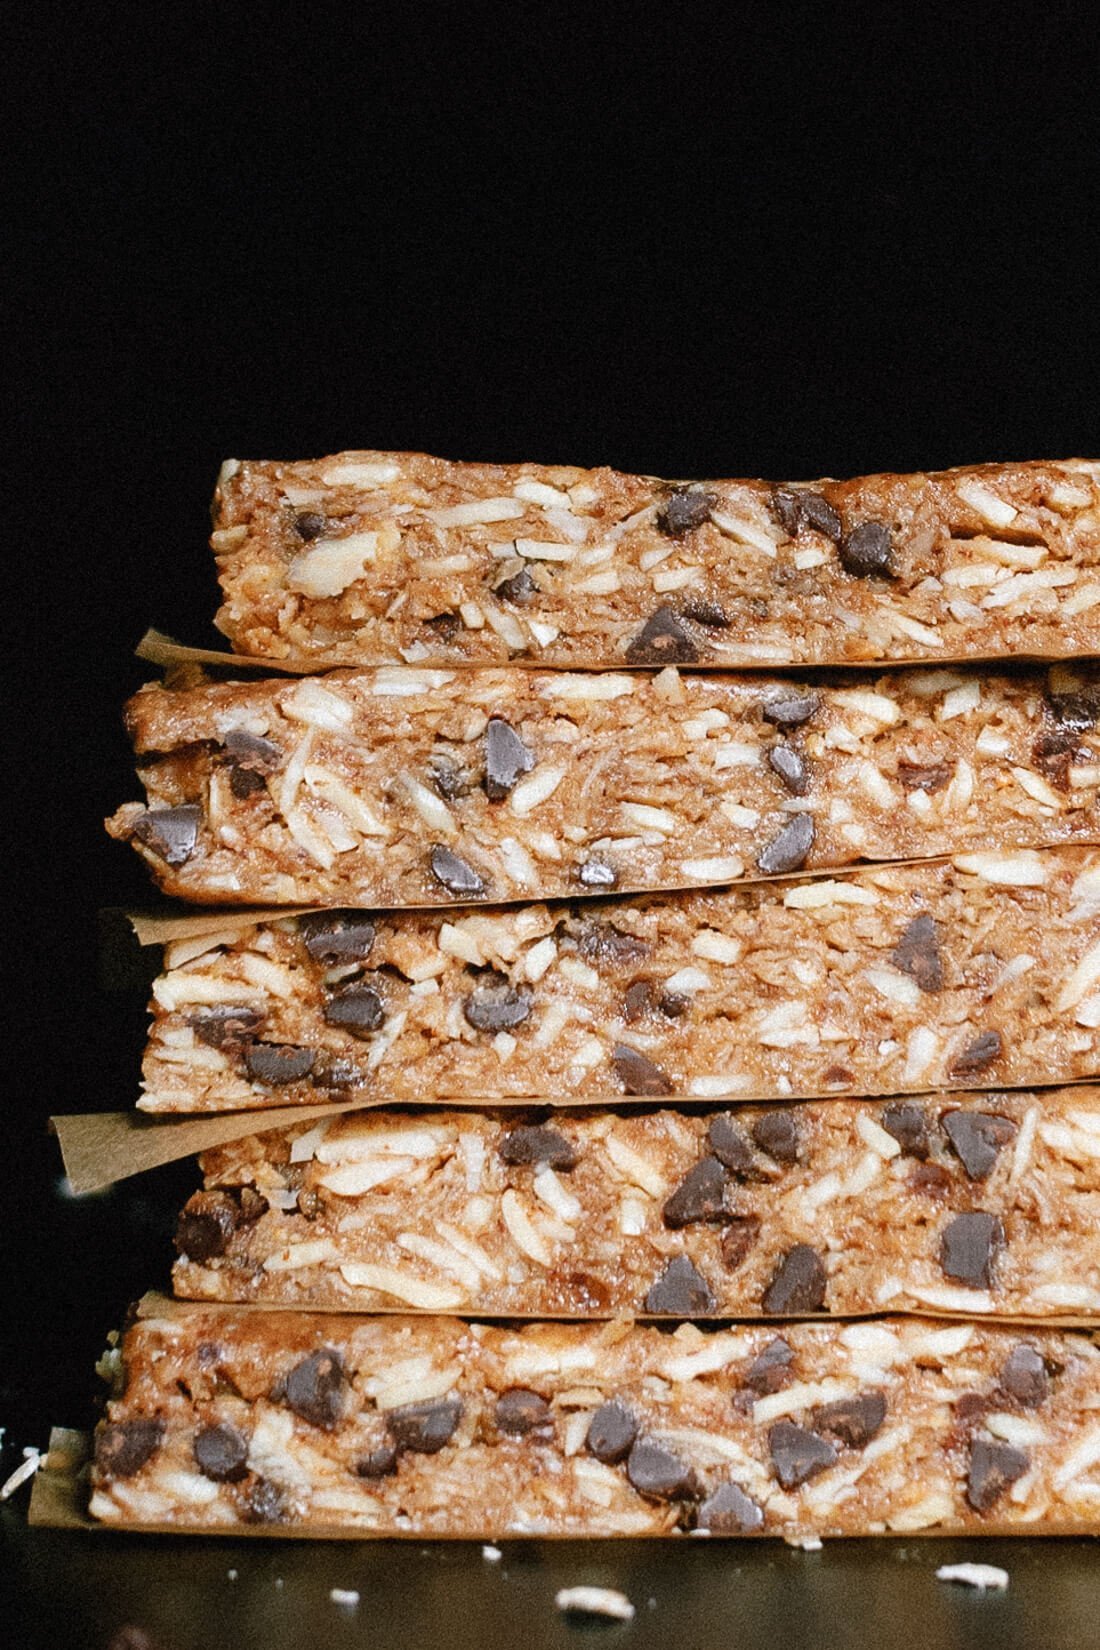
Chewy, no-bake, gluten-free granola bars made simply with oats, almonds, almond butter or peanut butter and chocolate chips. This healthy granola bar recipe is so delicious and easy to make. Homemade granola bars are great to keep on hand for traveling or whenever hunger strikes! Recipe yields 14 to 16 bars.
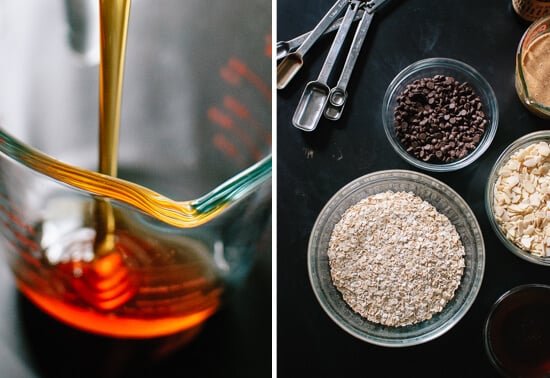
- Line an 8 to 9-inch square baker with two strips of criss-crossed parchment paper, cut to size. In a mixing bowl, combine the oats, almonds, chocolate chips, cinnamon and salt. Whisk to combine.
- In a 2-cup liquid measuring cup, measure out the nut butter. Top with ½ cup honey and the vanilla extract. Whisk until well blended. If you must, you can gently warm the liquid mixture on the stovetop or in the microwave, but make sure it’s cool before you pour it into the dry mixture (the chocolate chips will melt).
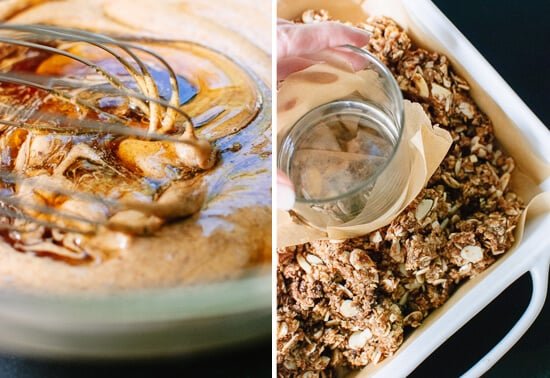
- Pour the liquid ingredients into the dry ingredients. Use a big spoon to mix them together until the two are evenly combined and no dry oats remain. The drier the mixture, the more firm the bars will be, so stir in extra oats if the mixture seems wet.
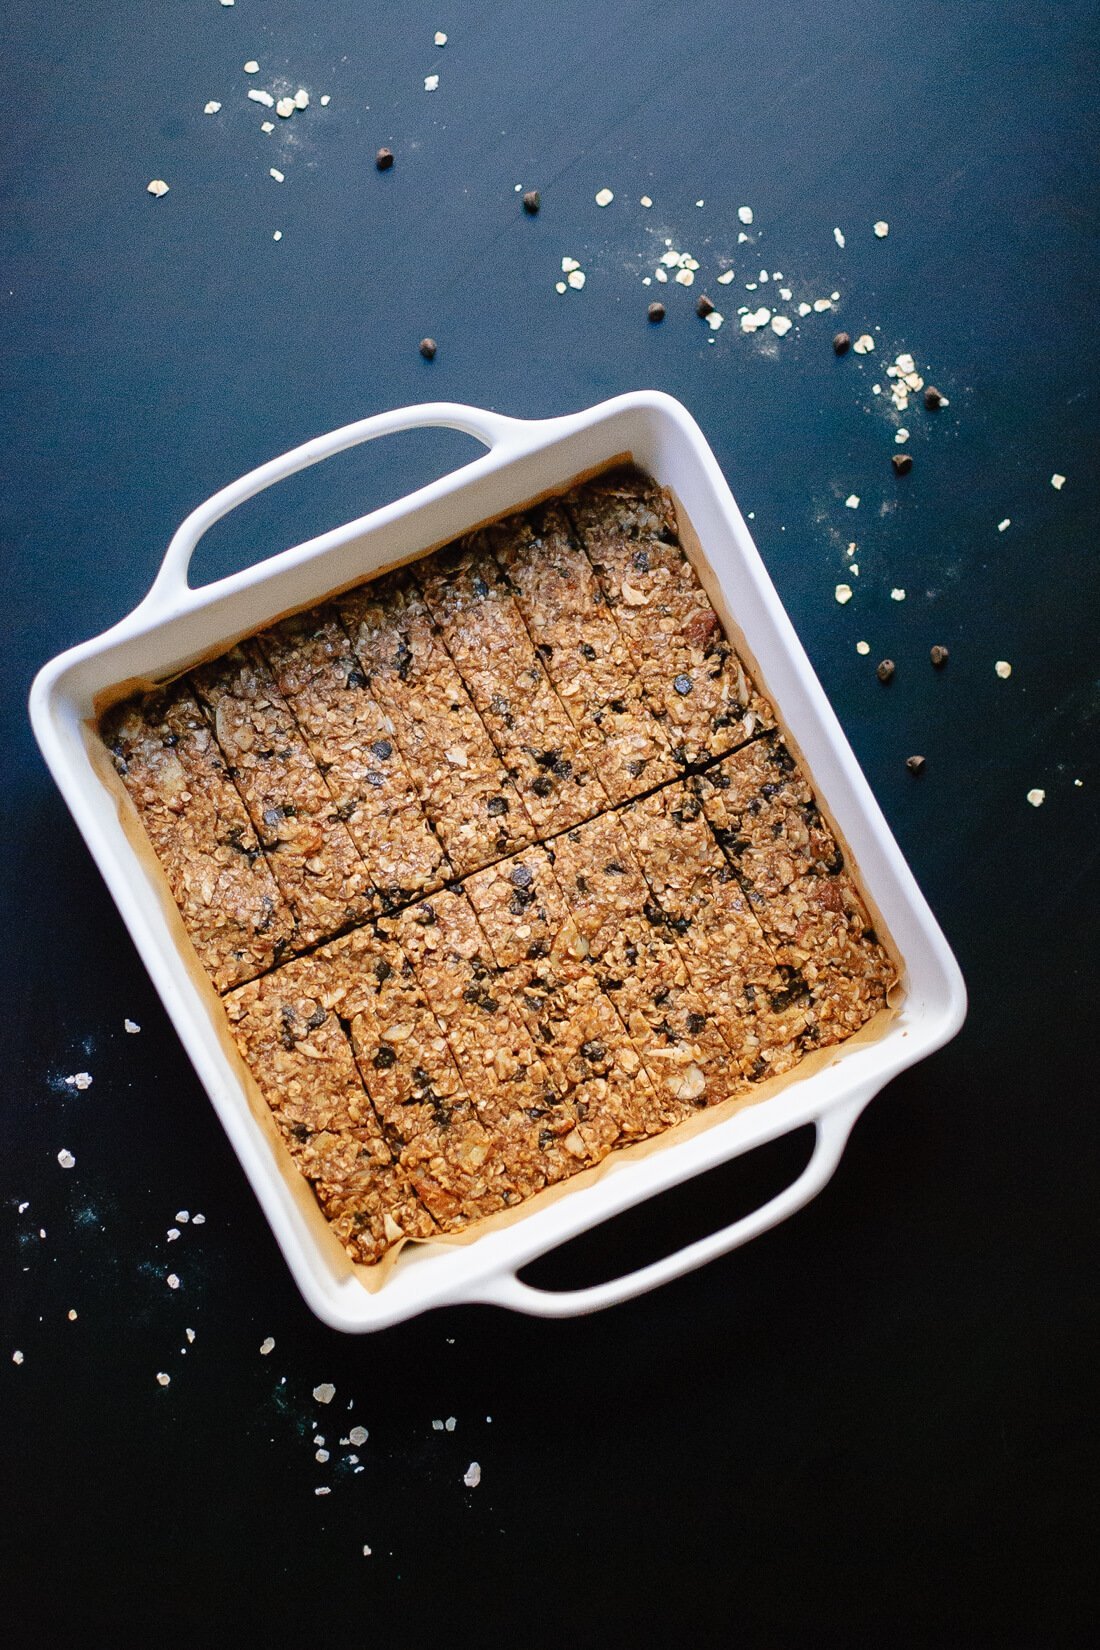
- Transfer the mixture to the prepared square baker. Use your spoon to arrange the mixture fairly evenly in the baker, then use the bottom of a flat, round surface (like a short, sturdy drinking glass), covered in a small piece of parchment paper (see photo), to pack the mixture down as firmly and evenly as possible.
- Cover the baker and refrigerate for at least one hour, or overnight. Use a sharp knife to slice the bars. For portability, you can wrap individual bars in plastic wrap or parchment paper. Bars keep well for a couple of days at room temperature, but I recommend storing individually wrapped bars in a freezer-safe bag in the freezer for best flavor.
Notes
Recipe adapted from Sally’s Baking Addiction and Smitten Kitchen.
Make it gluten free: Be sure to buy certified gluten-free oats.
Make it vegan: Substitute maple syrup for the honey and use dairy-free chocolate chips.
Make it dairy free: Use dairy-free chocolate chips.
Change it up: Feel free to substitute chopped, toasted nuts for the sliced almonds, and chopped, dried fruit for the chocolate.
Nutrition
The information shown is an estimate provided by an online nutrition calculator. It should not be considered a substitute for a professional nutritionist’s advice. See our full nutrition disclosure here.
")
")